Using Adobe Illustrator to Separate Layers from an Image
The simplest way to separate colors of a rasterized image to use for screen printing is using the Image Trace tool in Adobe Illustrator.
Create new file with dimensions of final print.

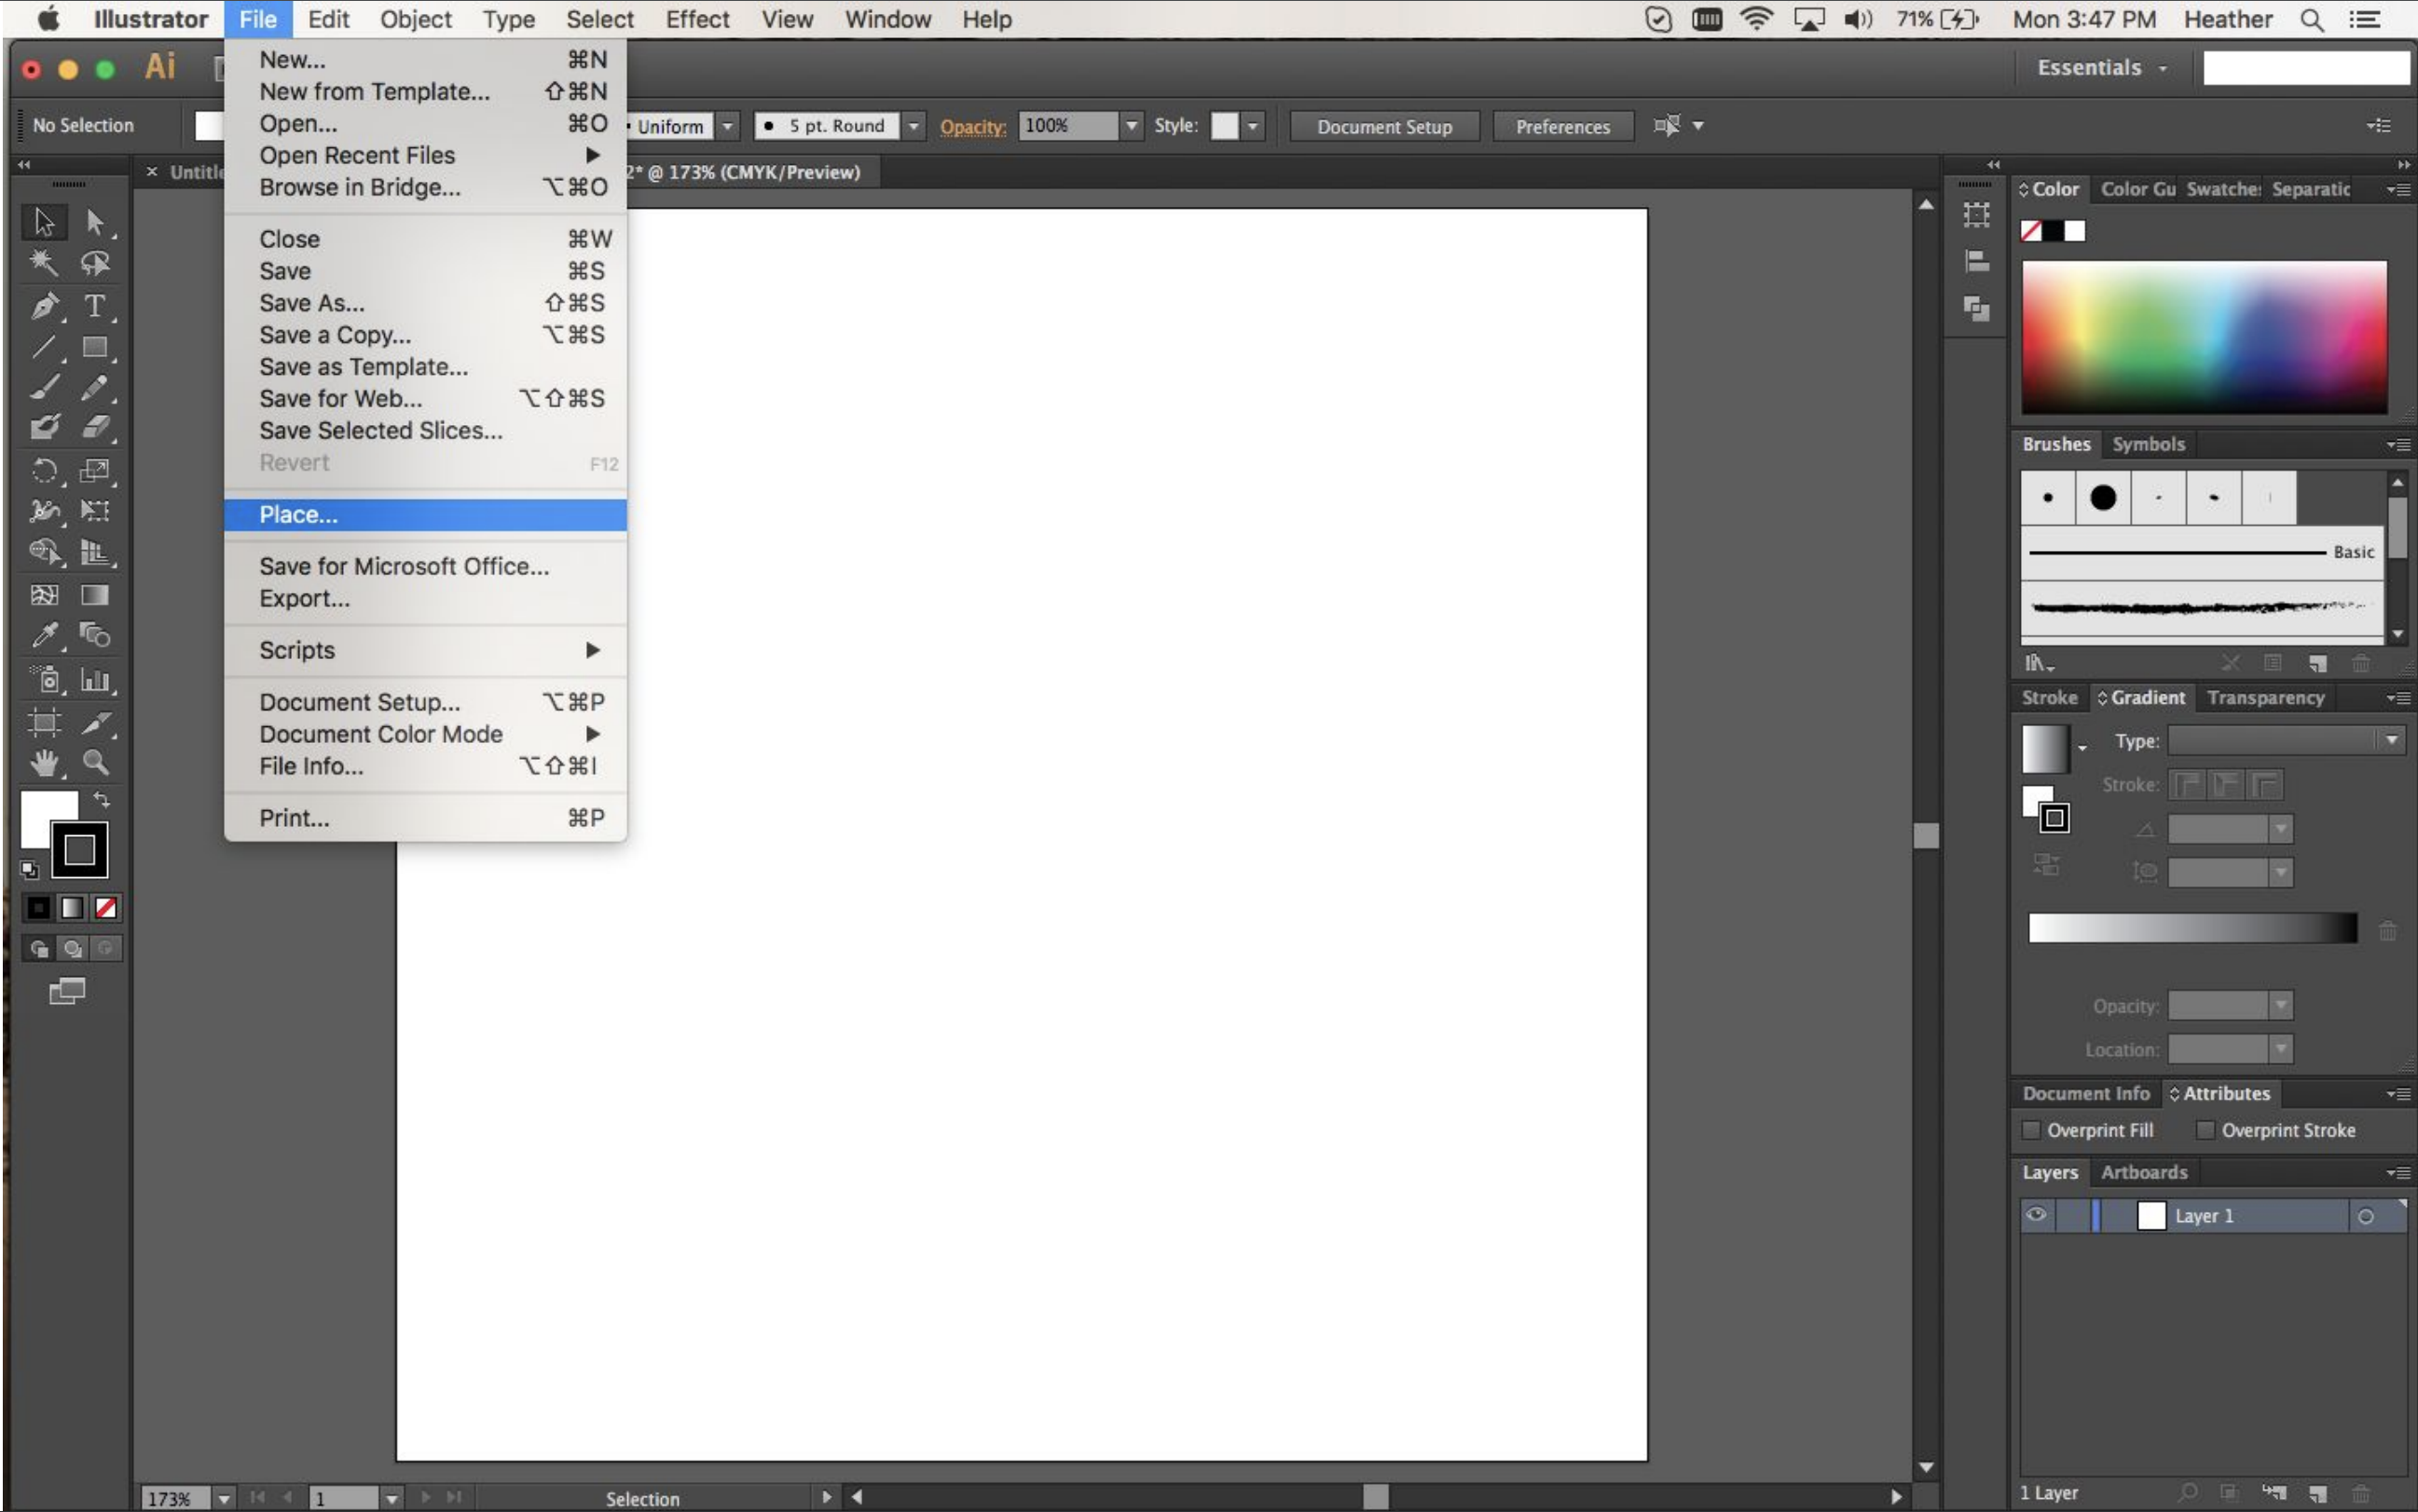
Place image file to use for reference for live trace
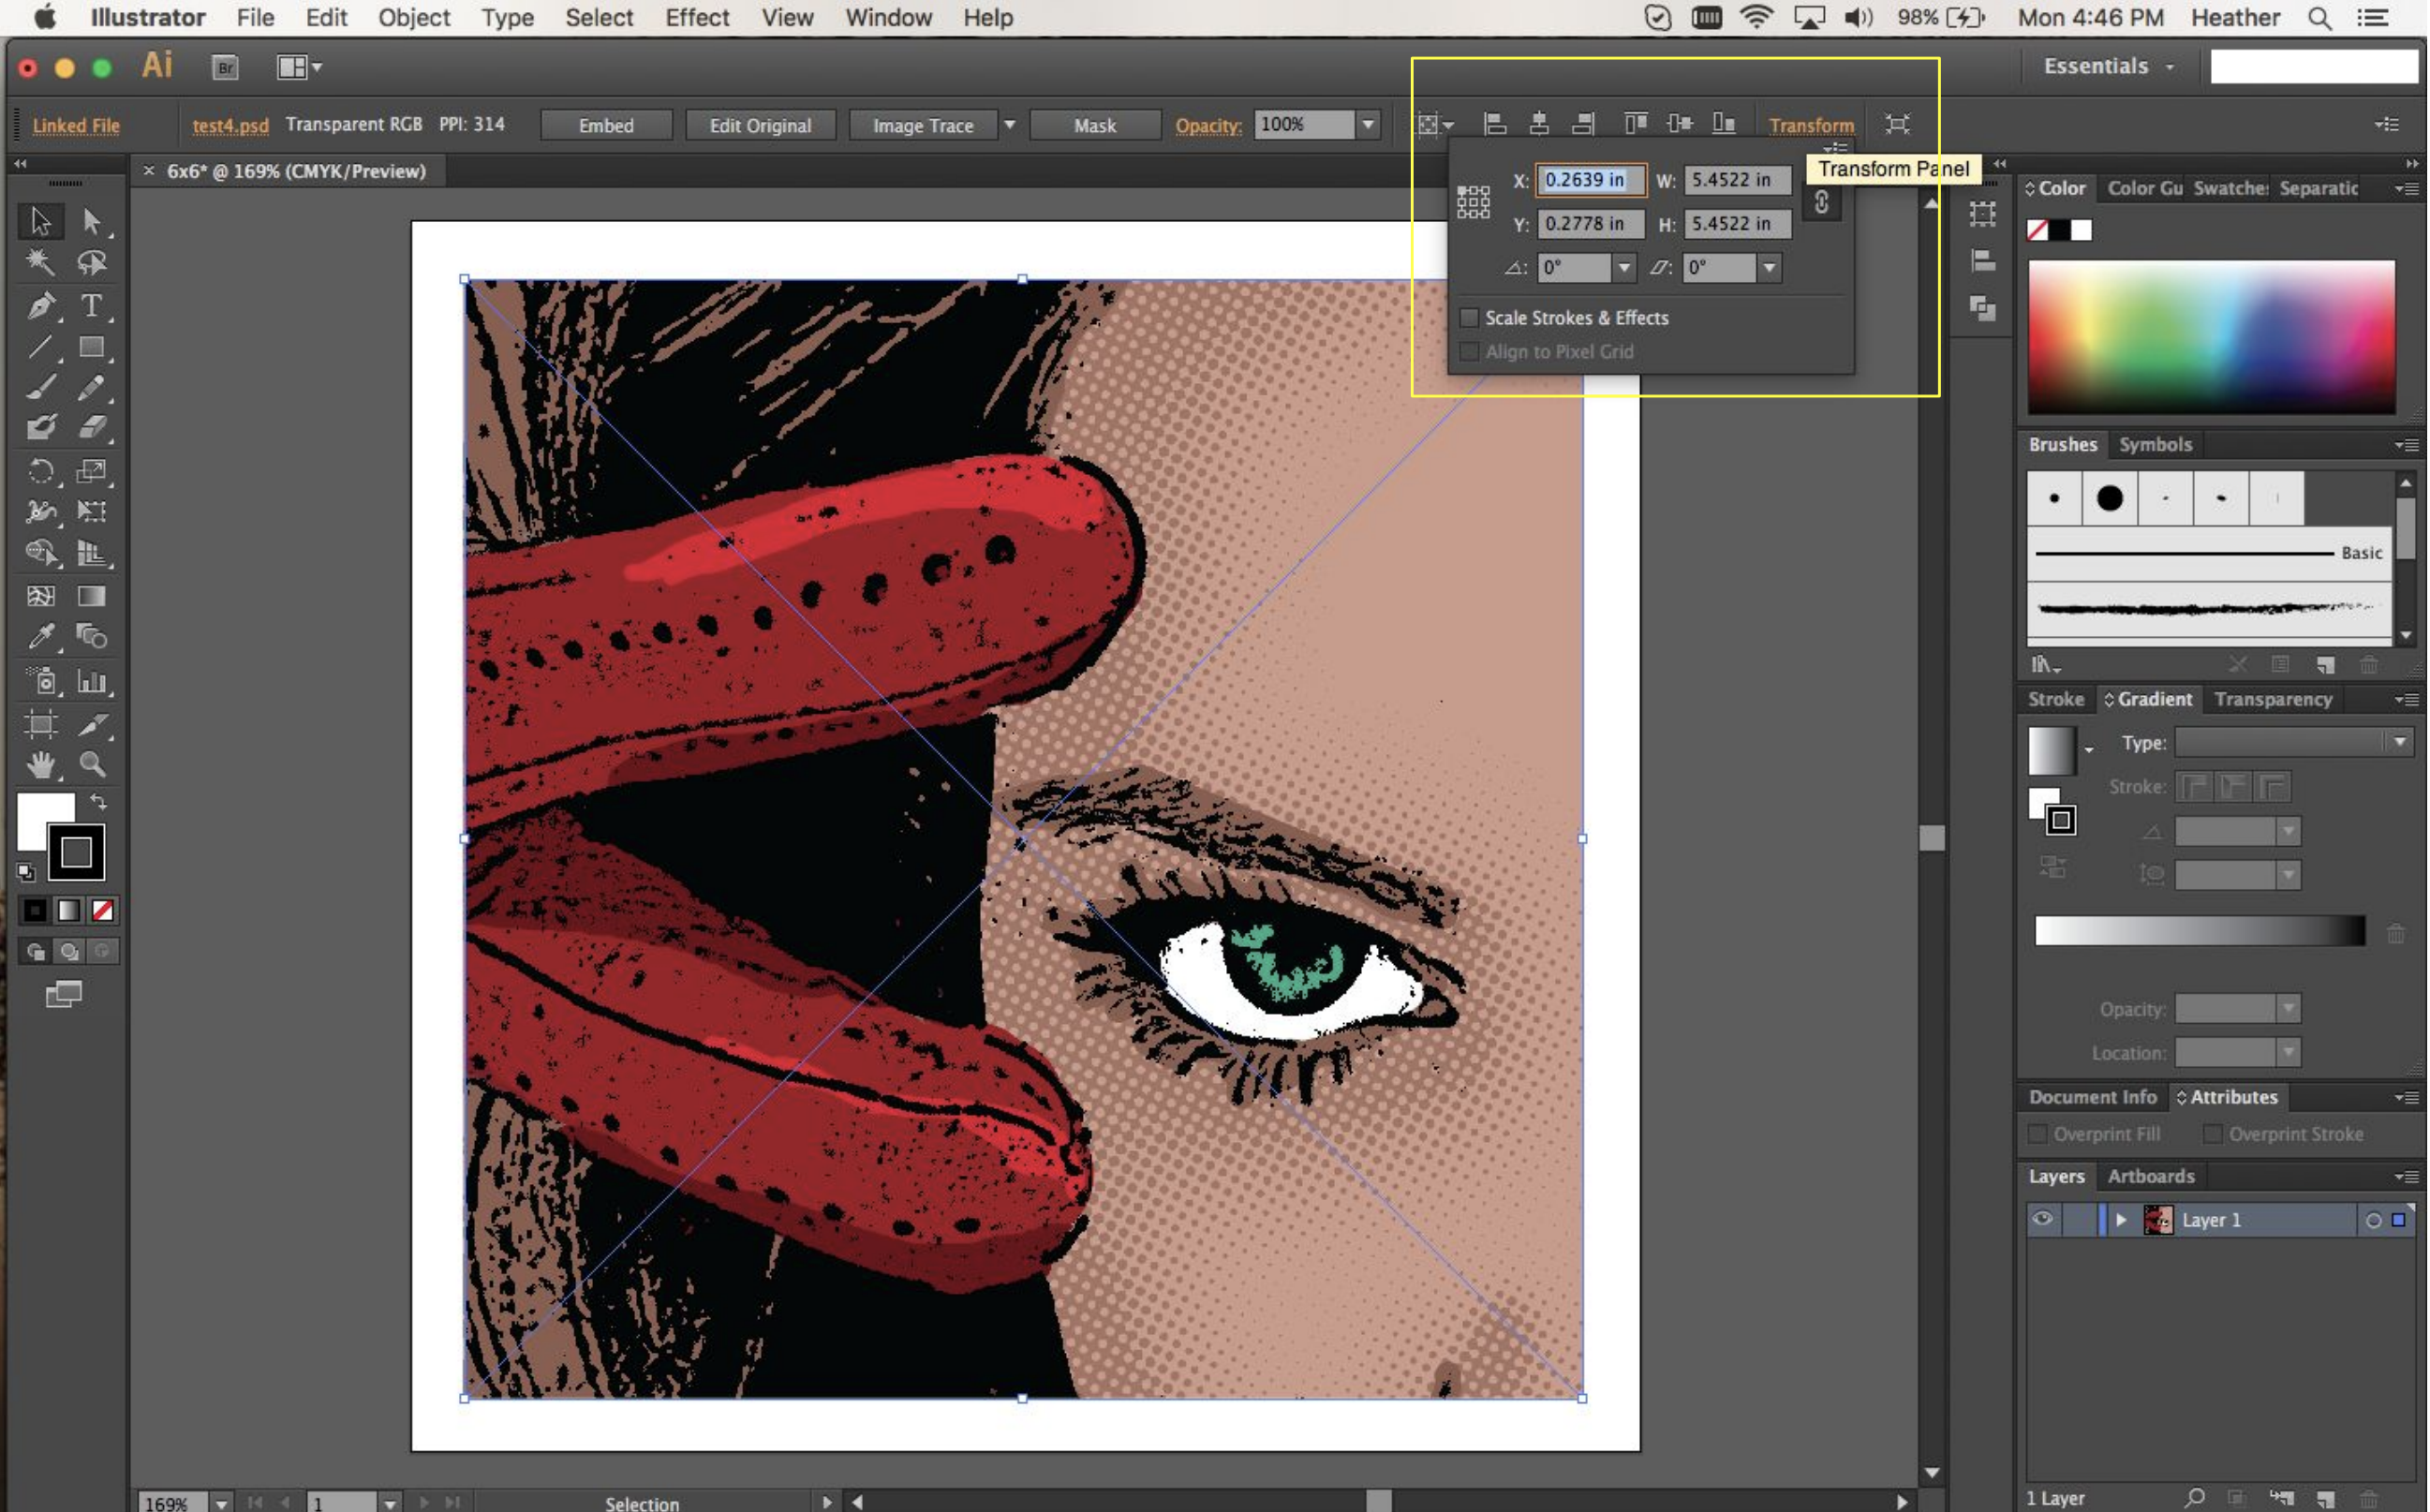
Resize image using transform panel. Note the link show keeps ratio consistent when resizing. Consider editing image in photoshop for more control over contrast, easy keylines, etc. note than the broken and unbroken chain symbol indicates if the height to width ratio is proportional or not.
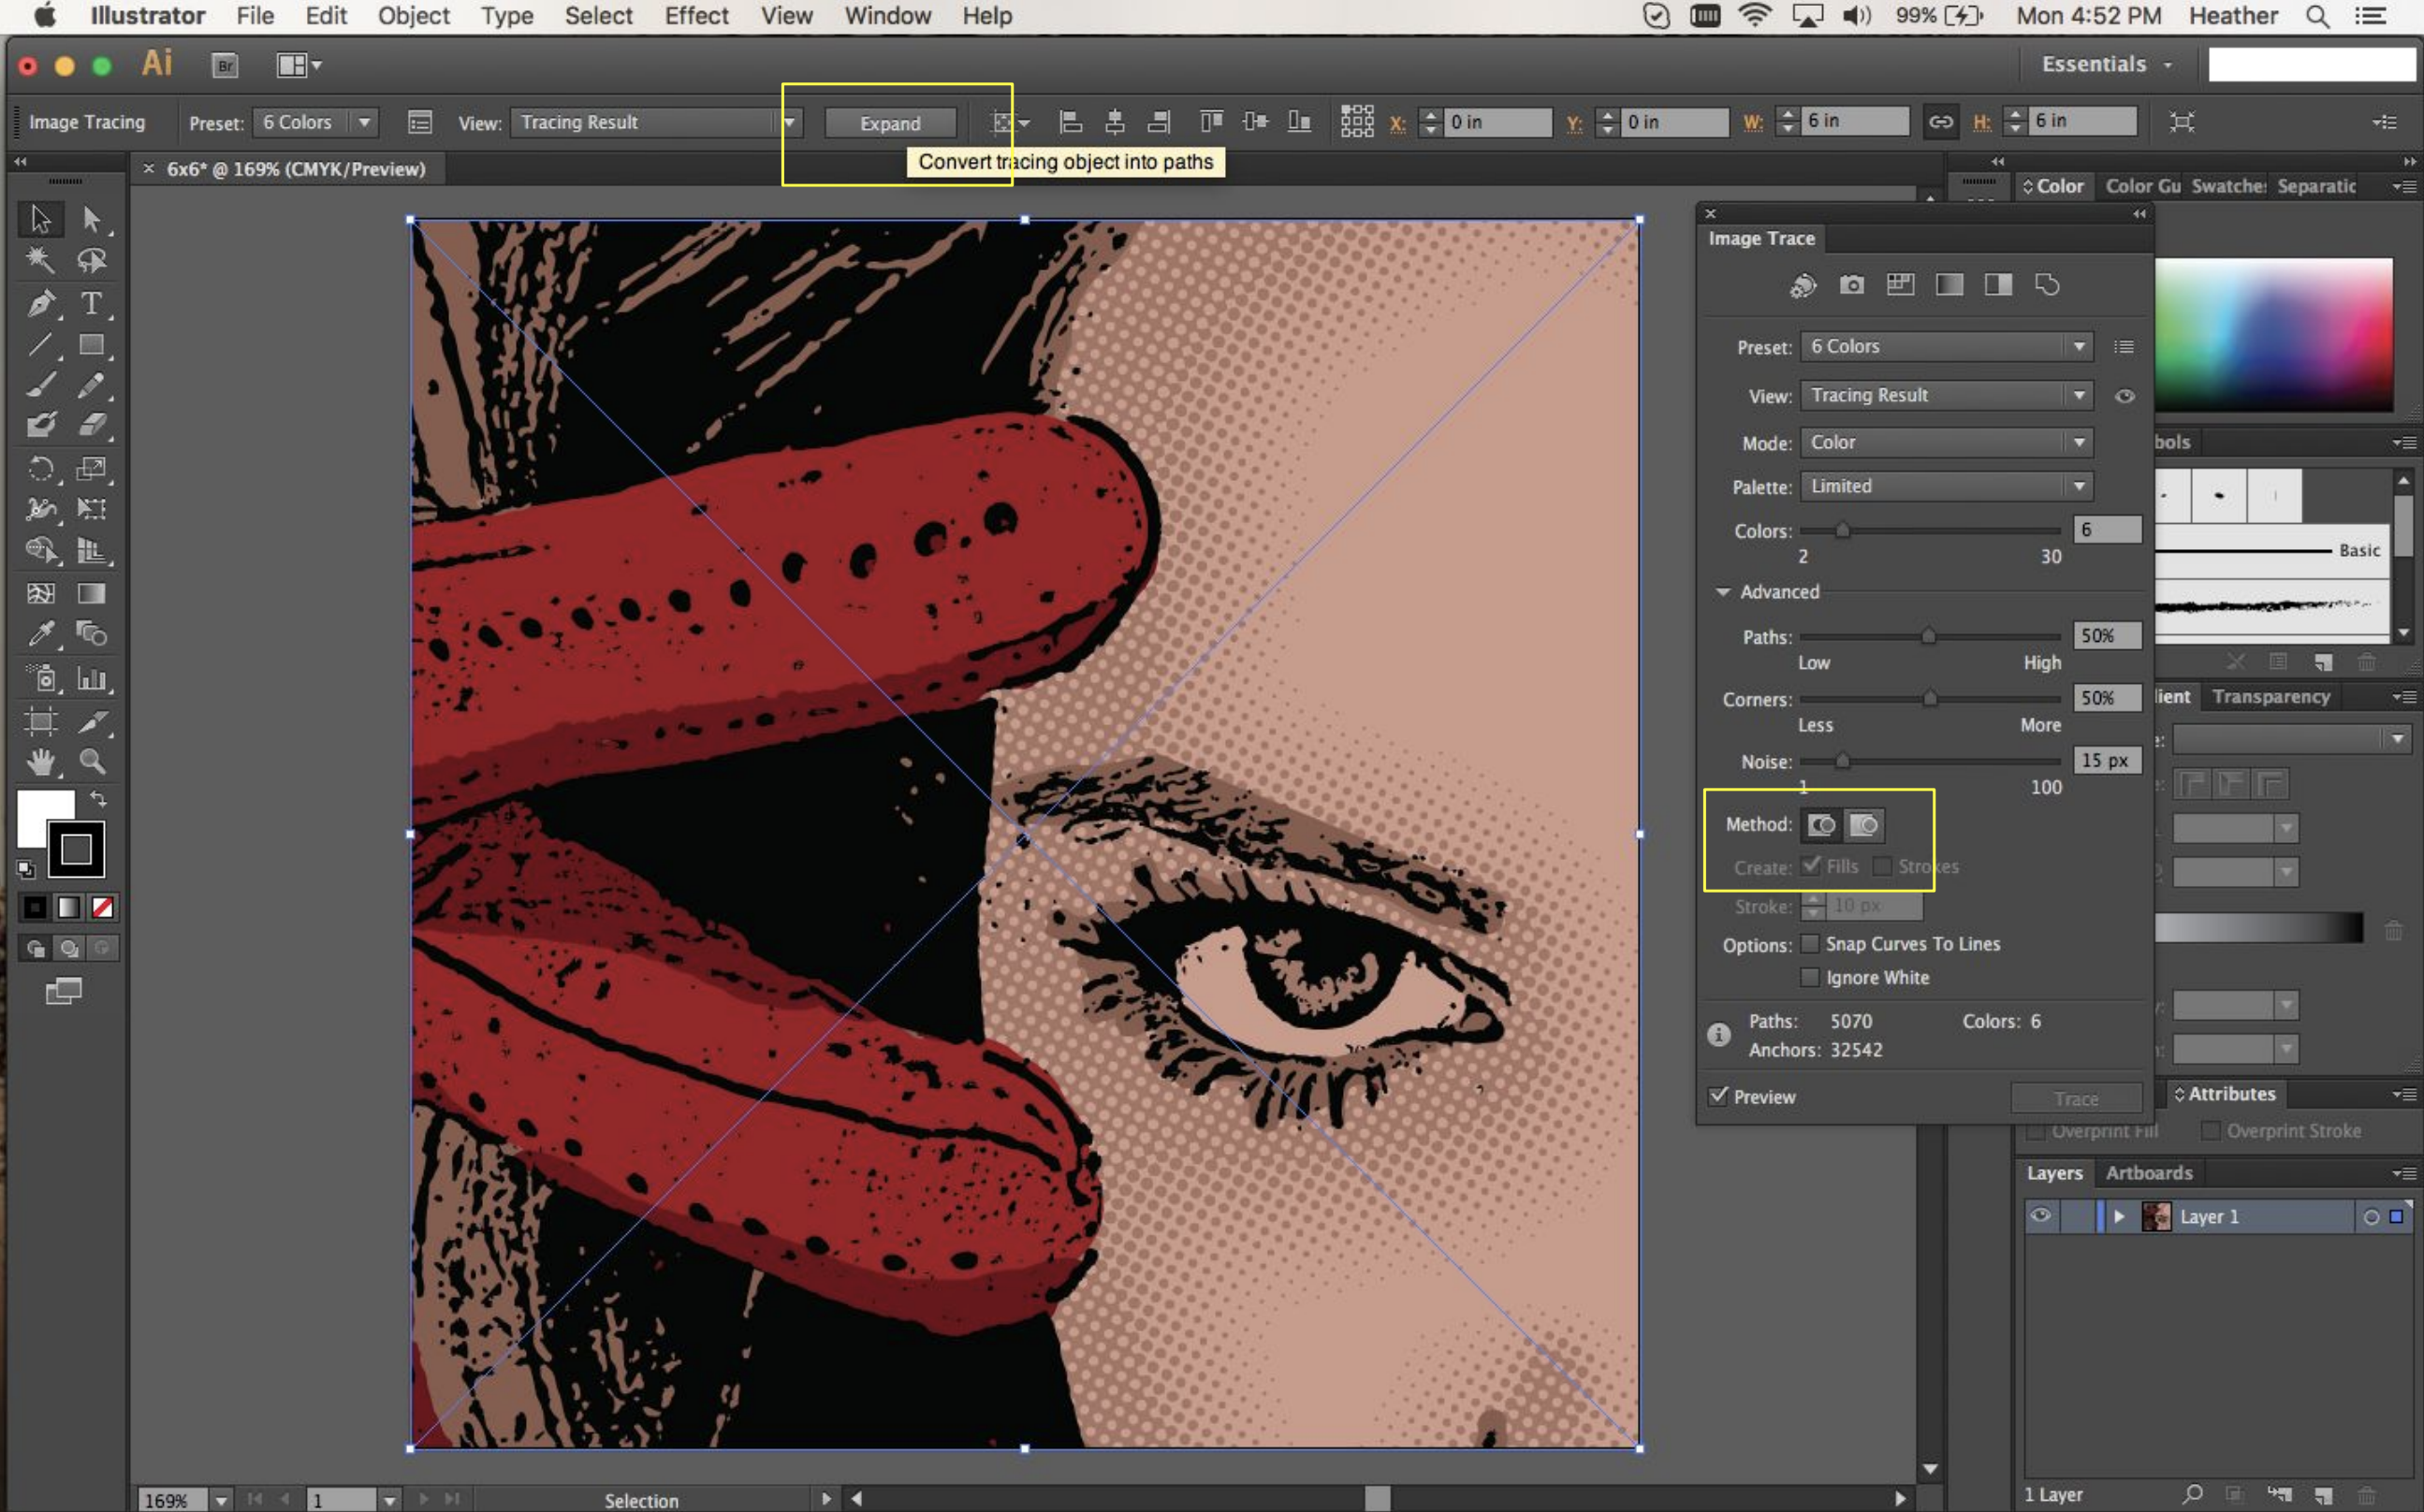
Use image trace to convert to vector file. Note the drop down arrow will give you different options for defaults. If the icon is not at the top of the screen, go to Windows > Image Trace.
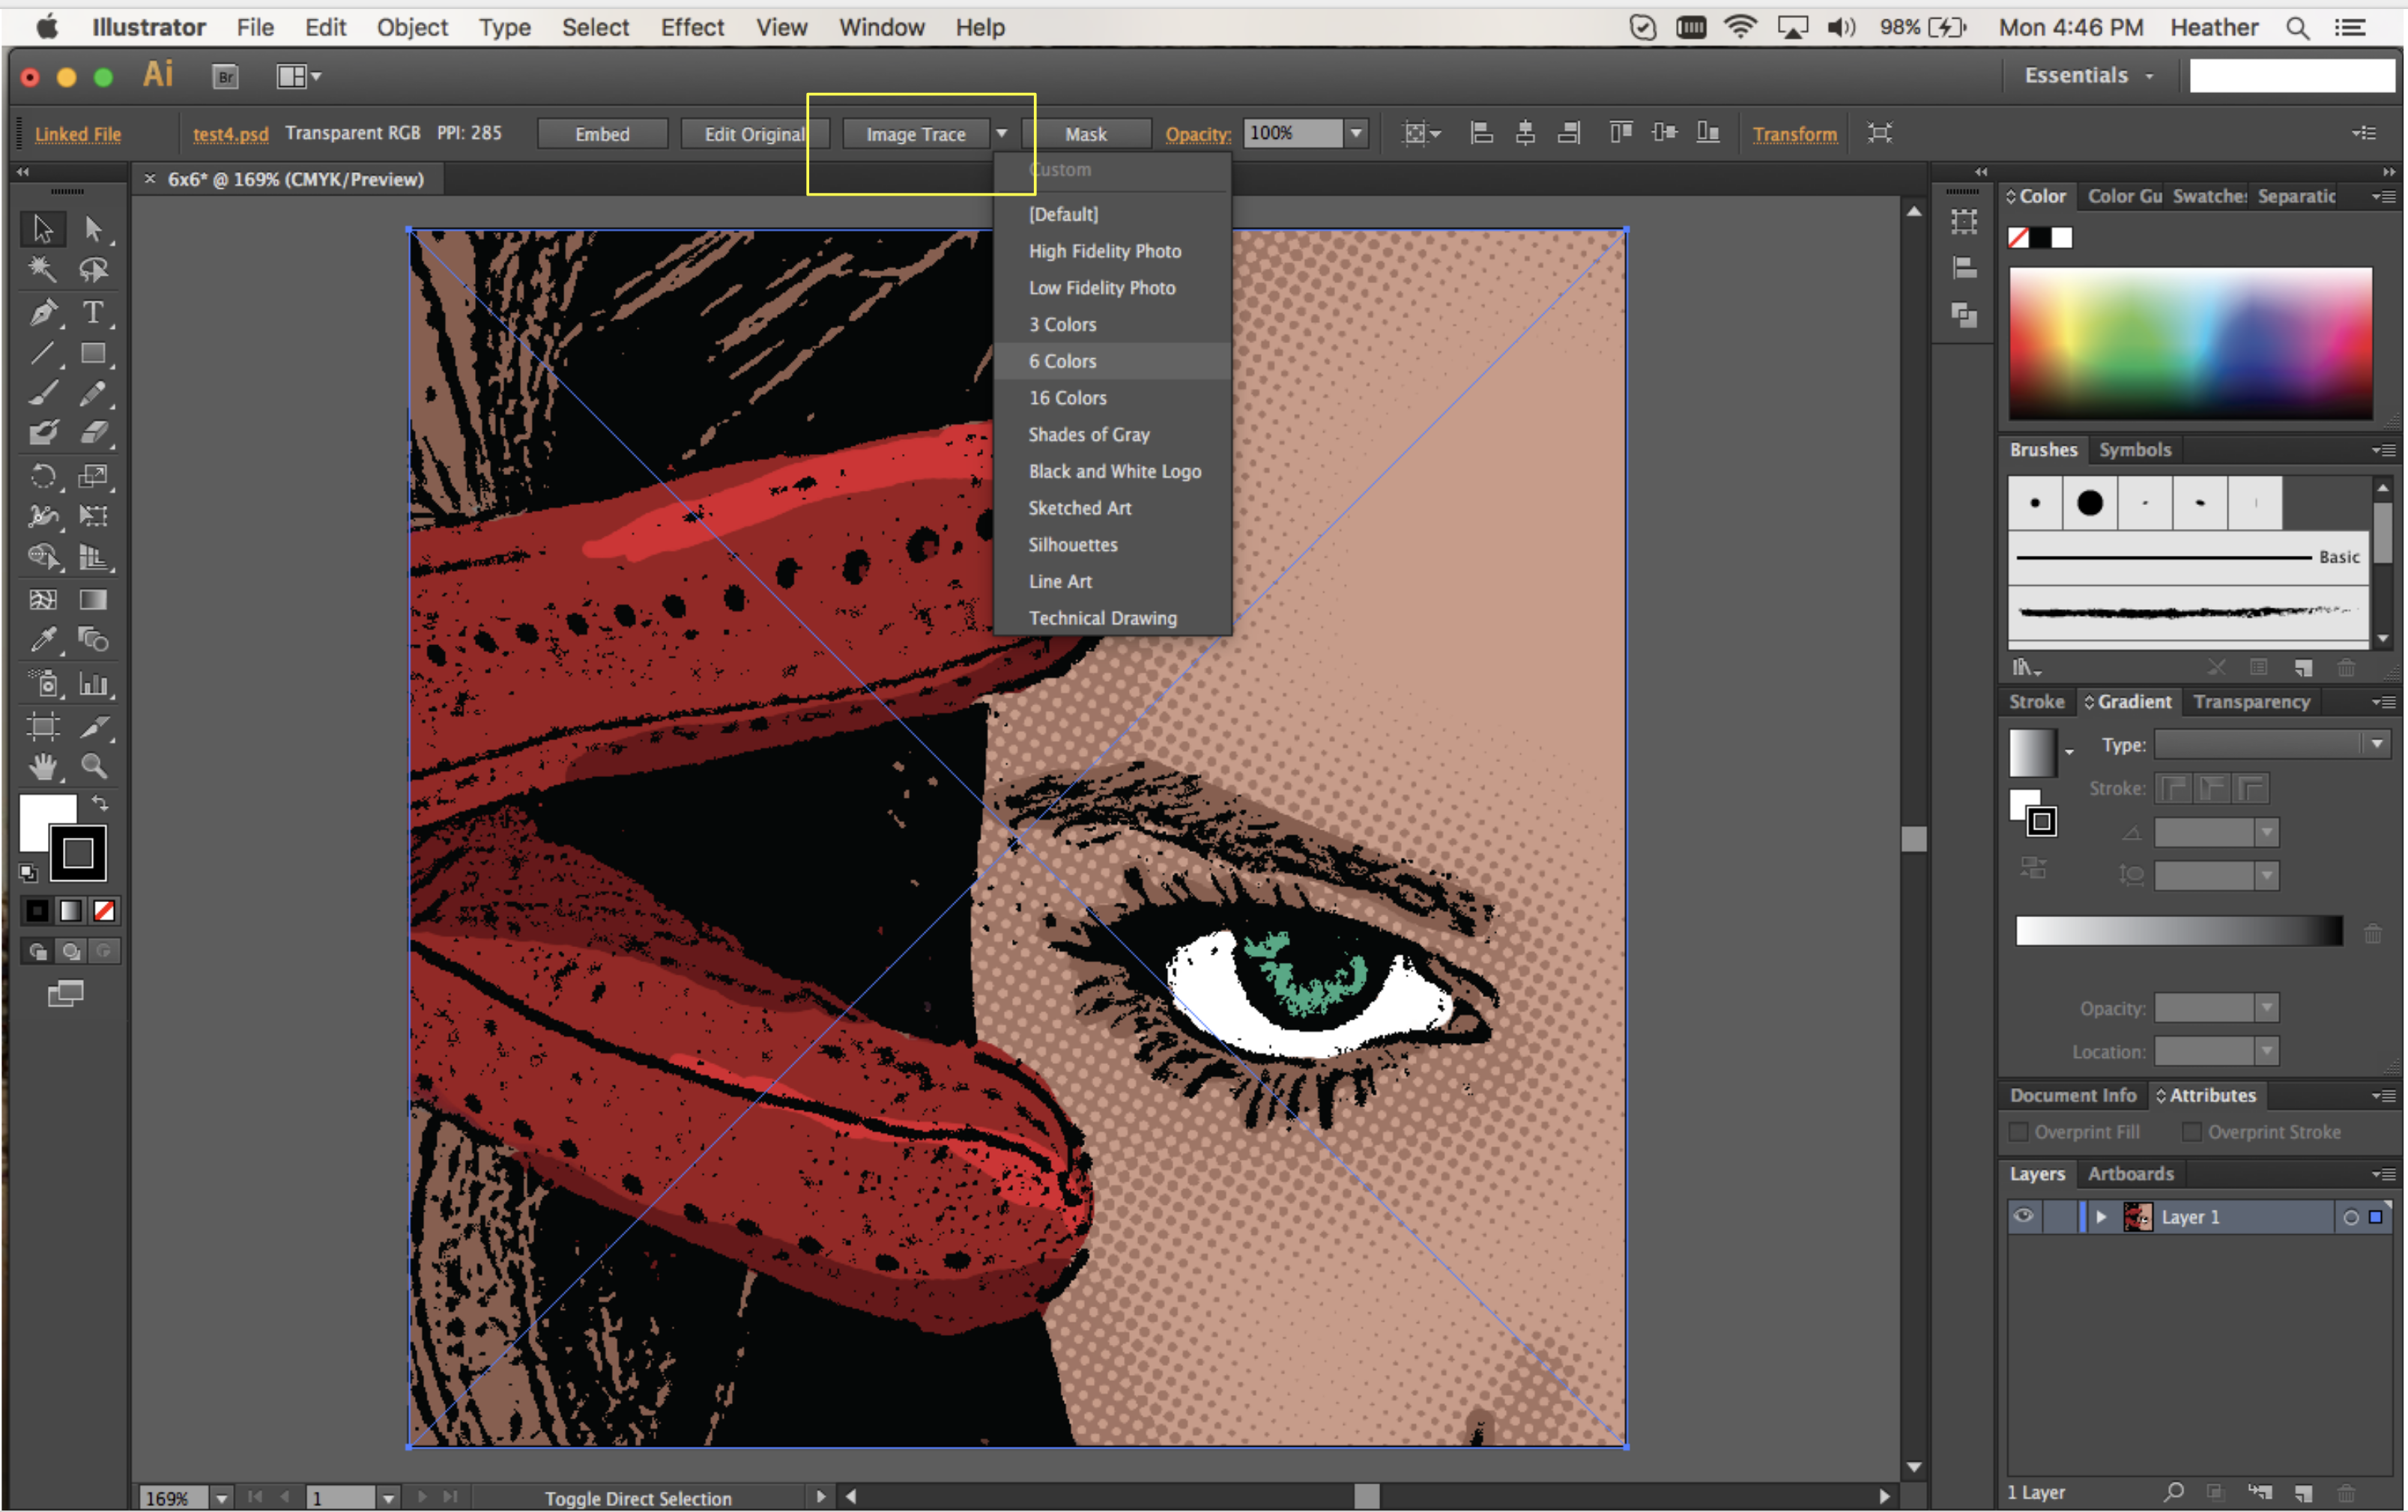
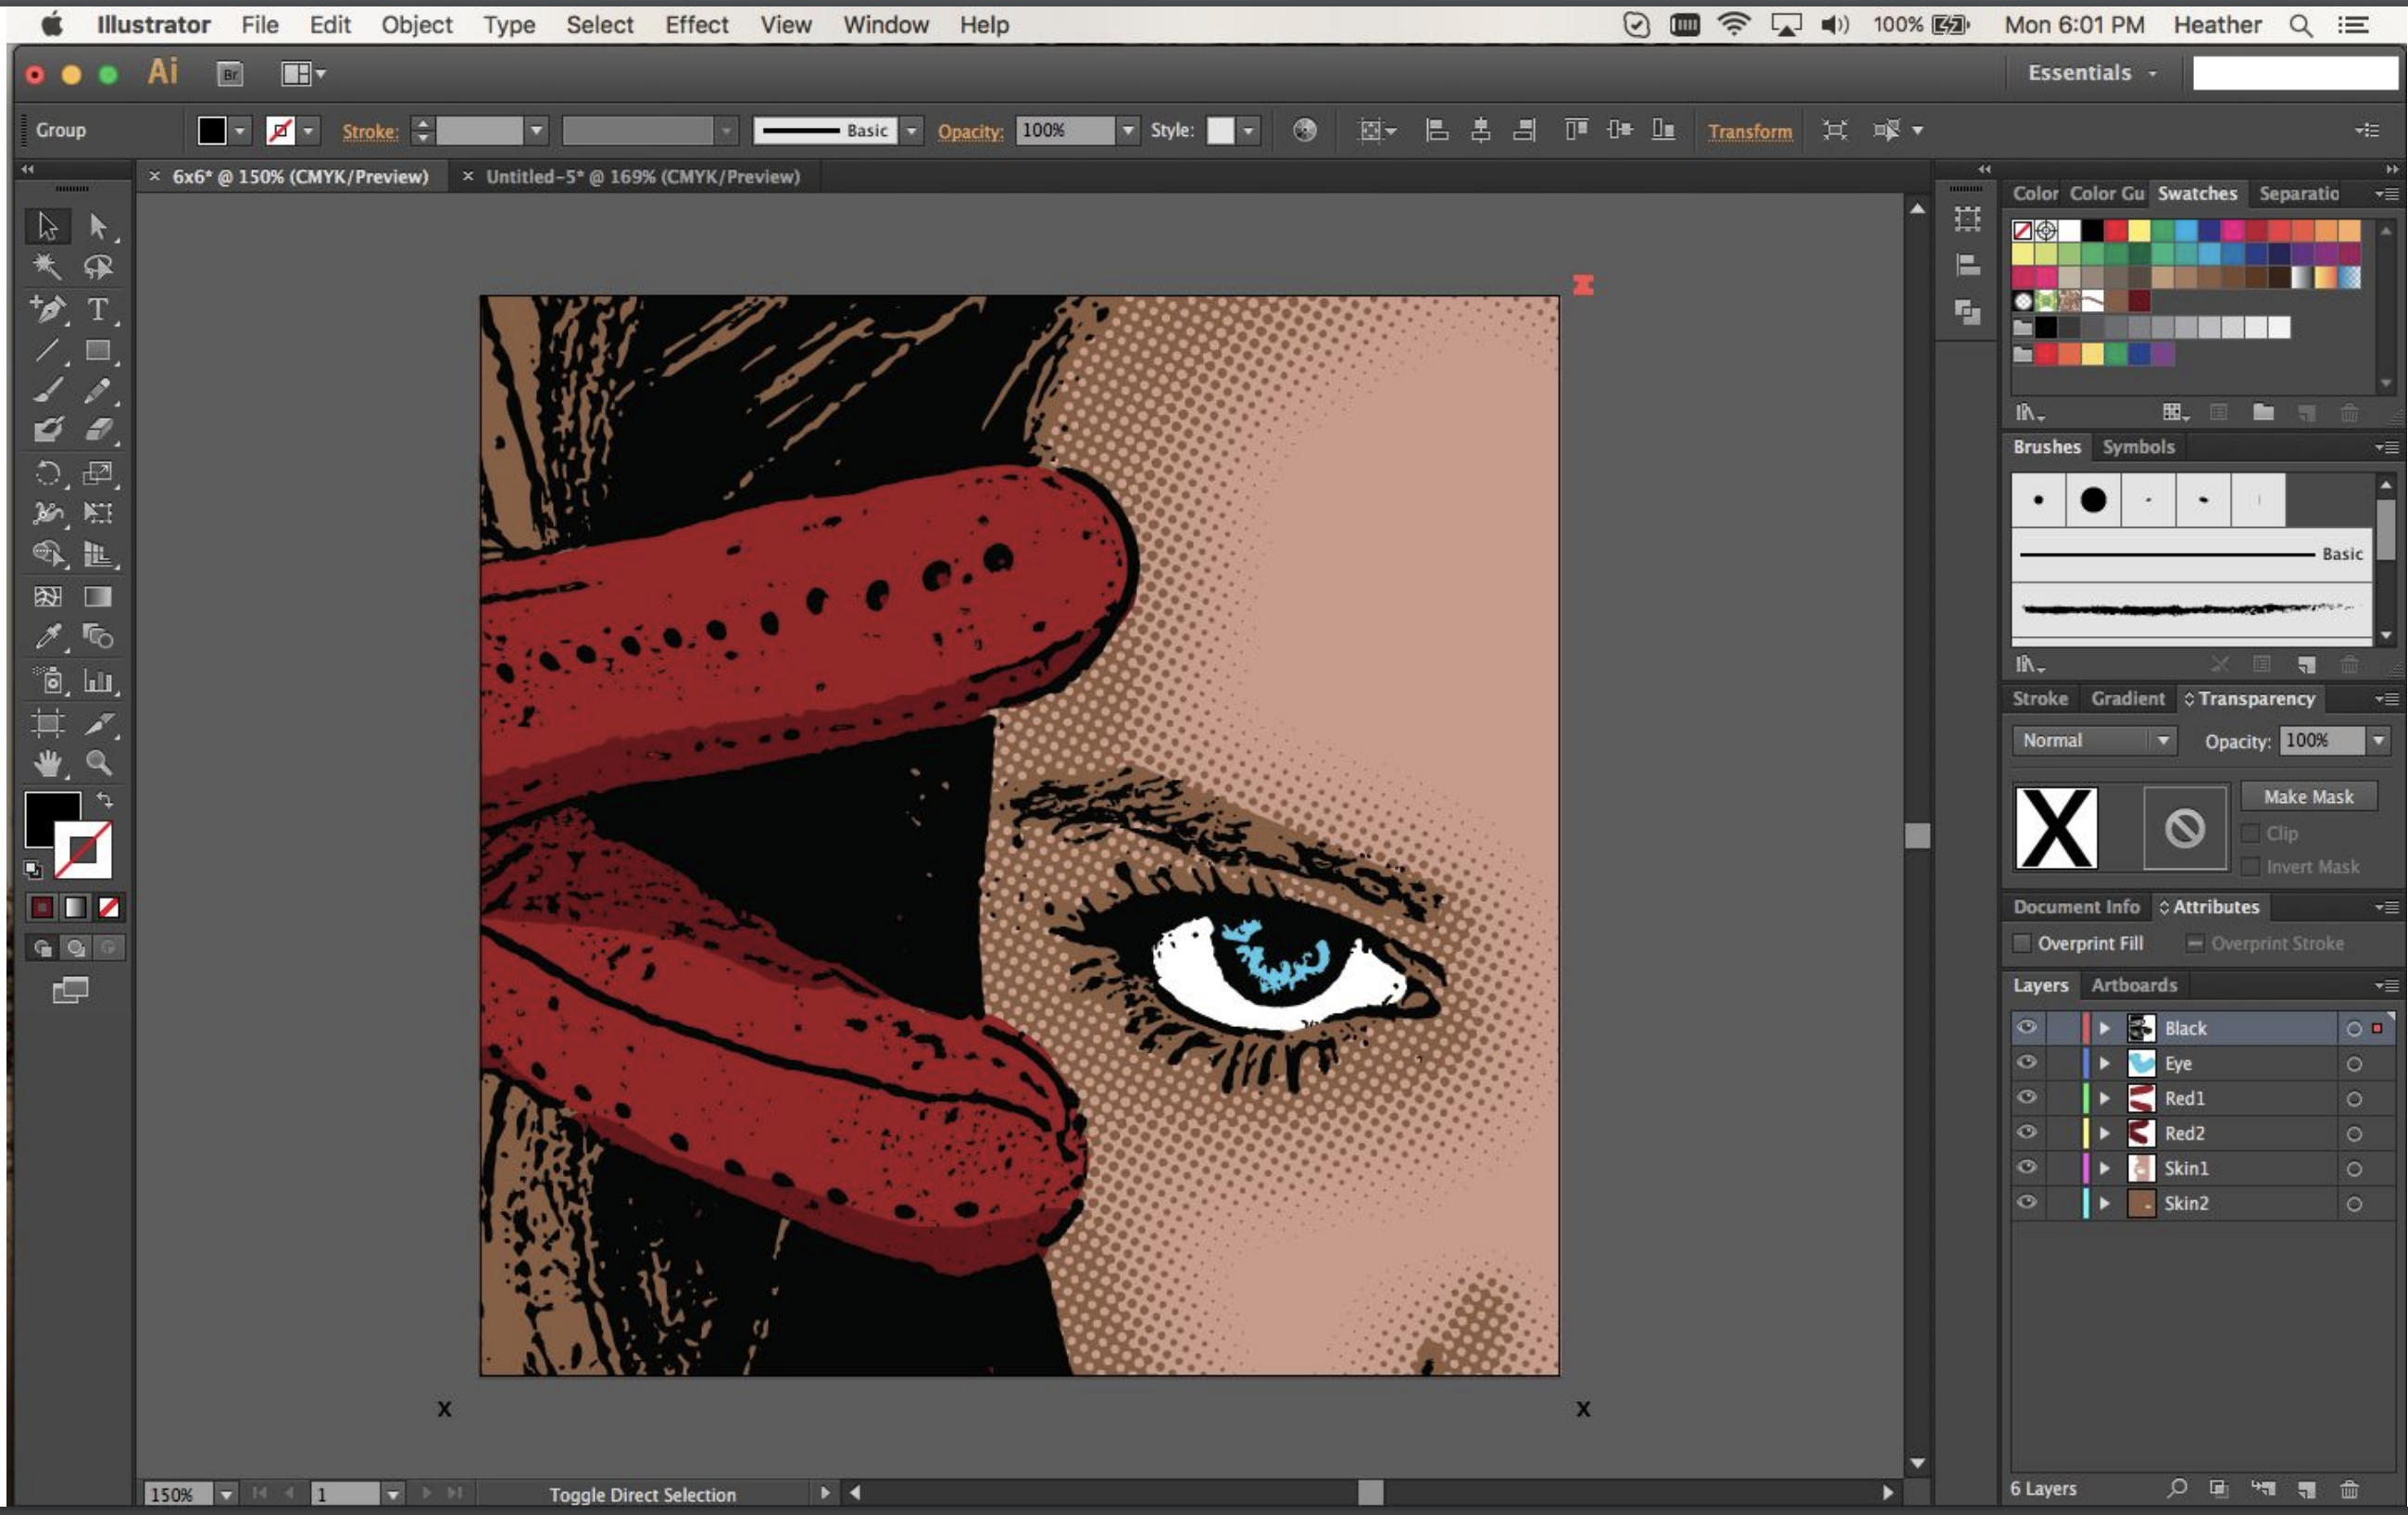
Image Trace management window provides all kinds of options. Typically AI washes out and selects average colors (see color went from eye) easy fix later. Note it’s sometimes better to use one “Method” or another, where colors overlap or where they cut out from one another. Once satisfied with what you see, click EXPAND. If the EXPAND option is not visible, with the object selected go to Object > Image Trace > Expand.
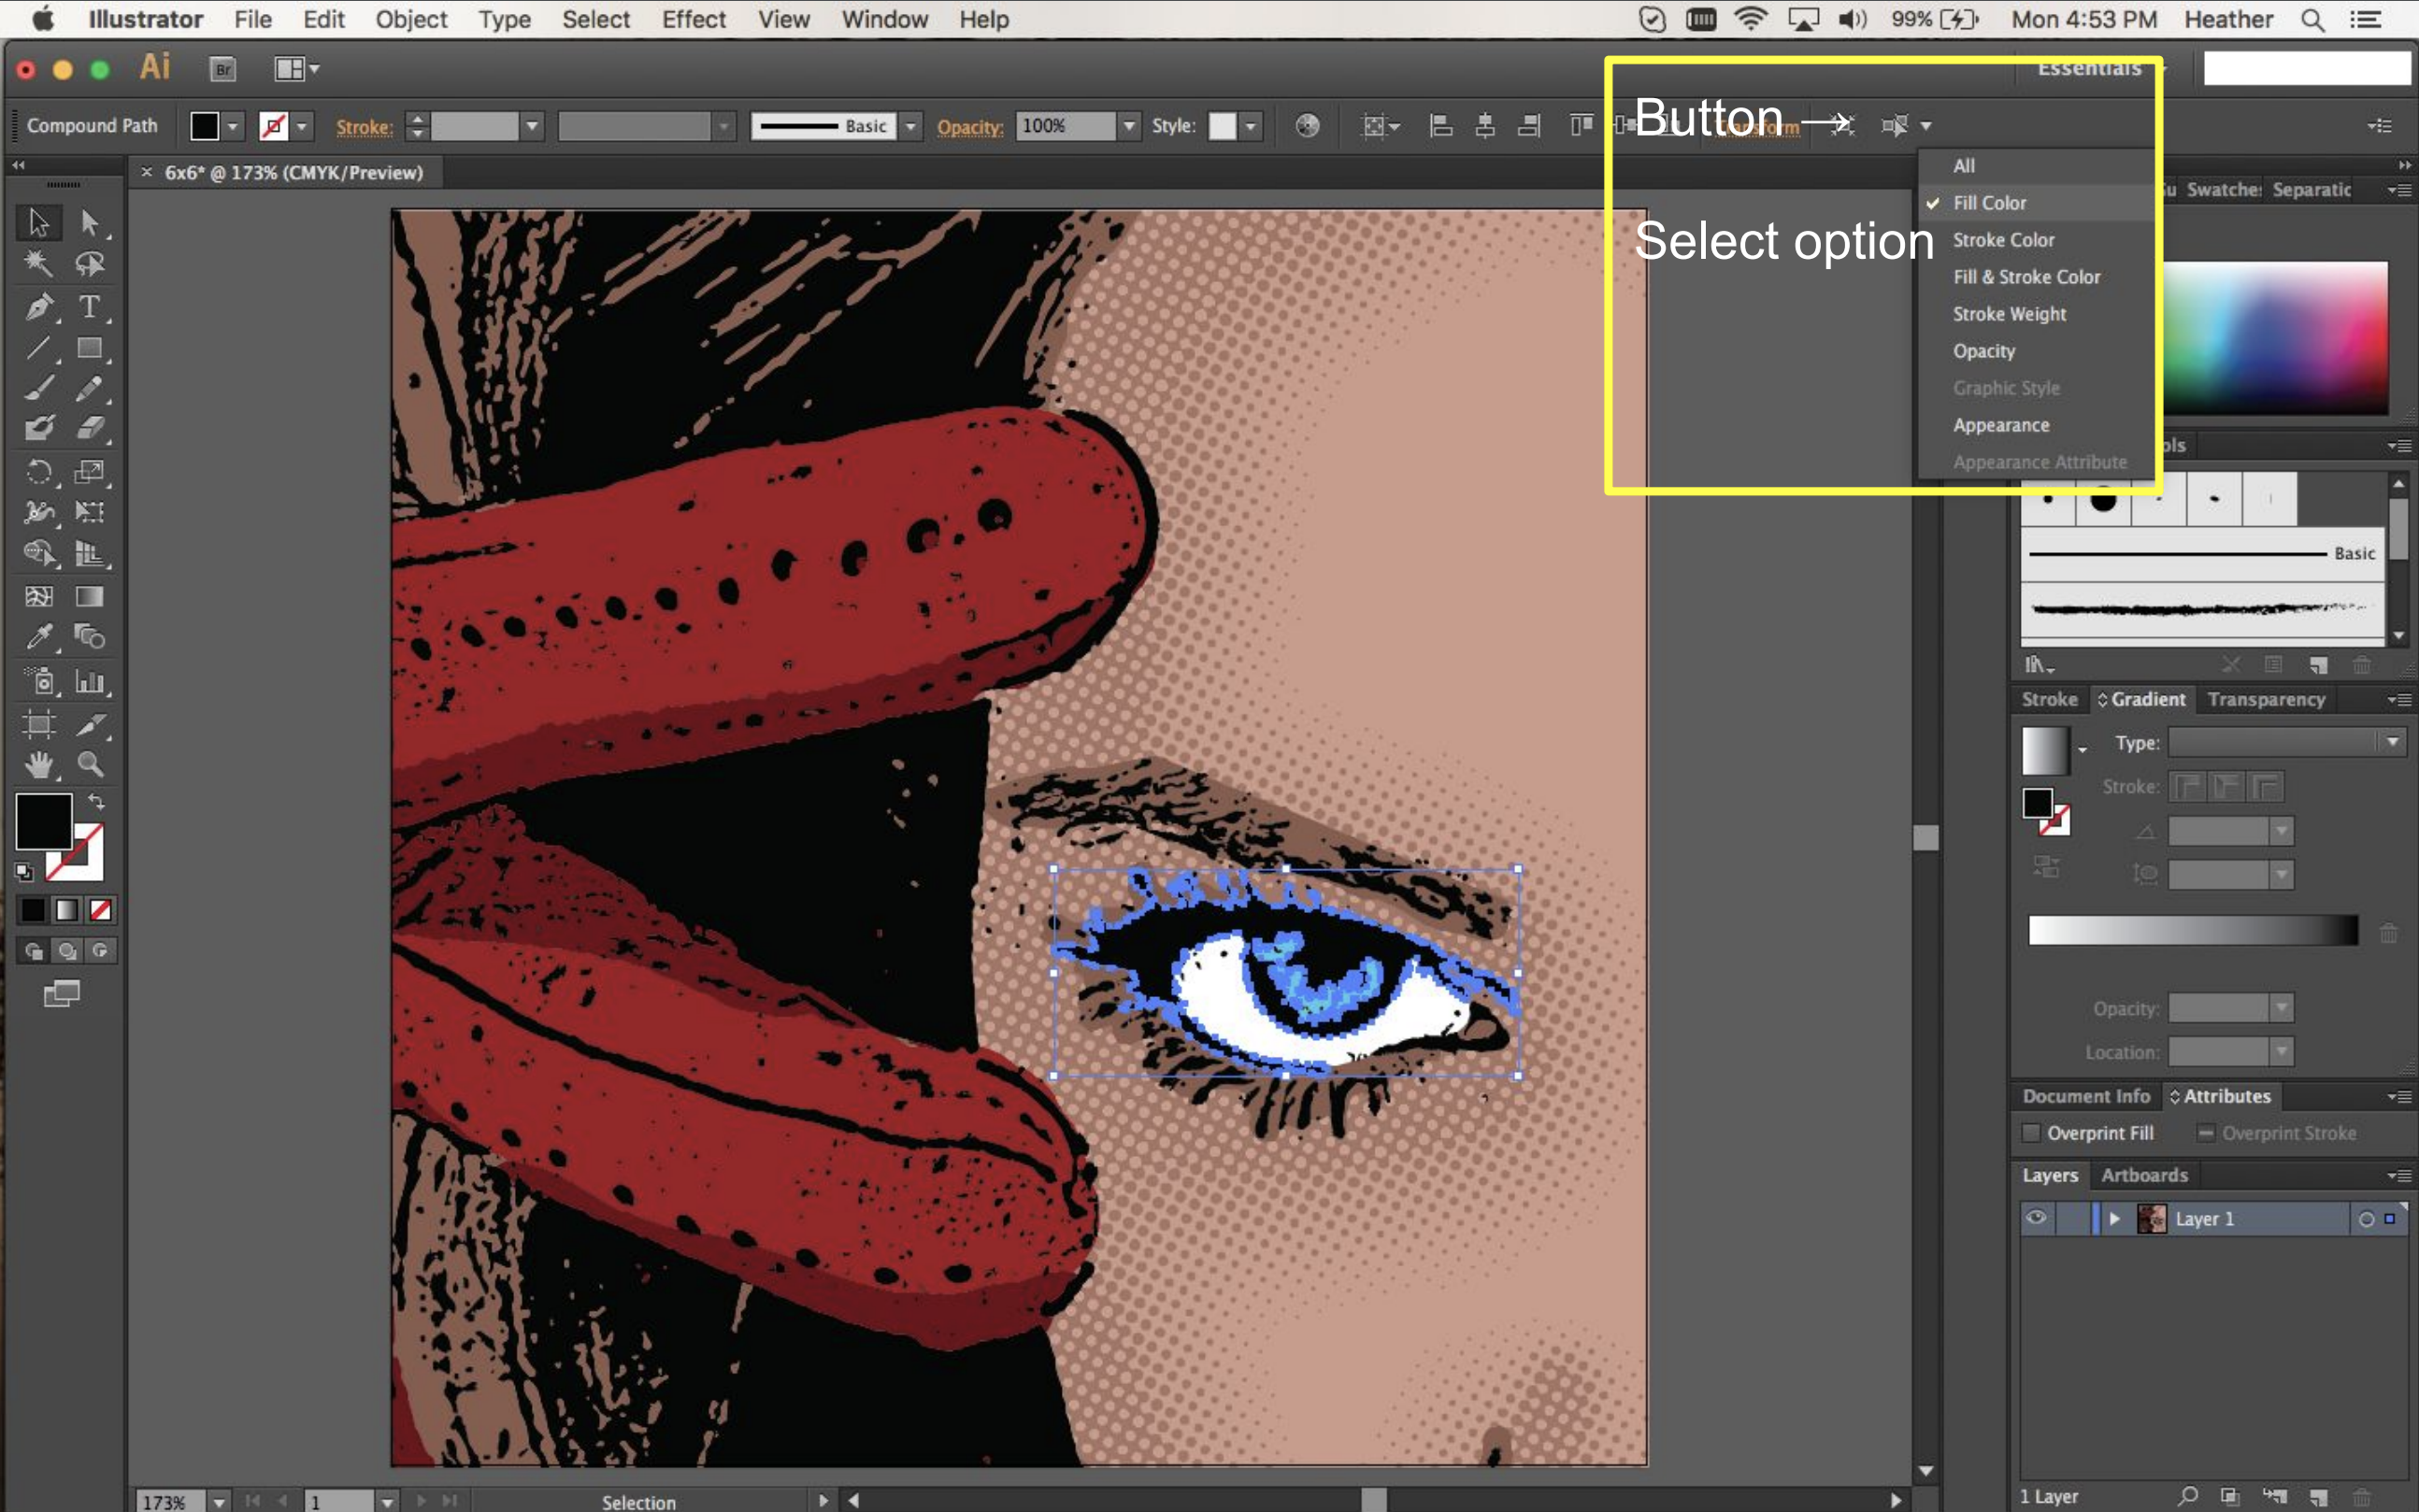
To select all colors and divide them to separate layers: Select one area of keyline color, then at the top right click the arrow to select fill color. Once you now click the button it will select all of the same fill. This is also available from the top menu via Select > Same > Fill Color.
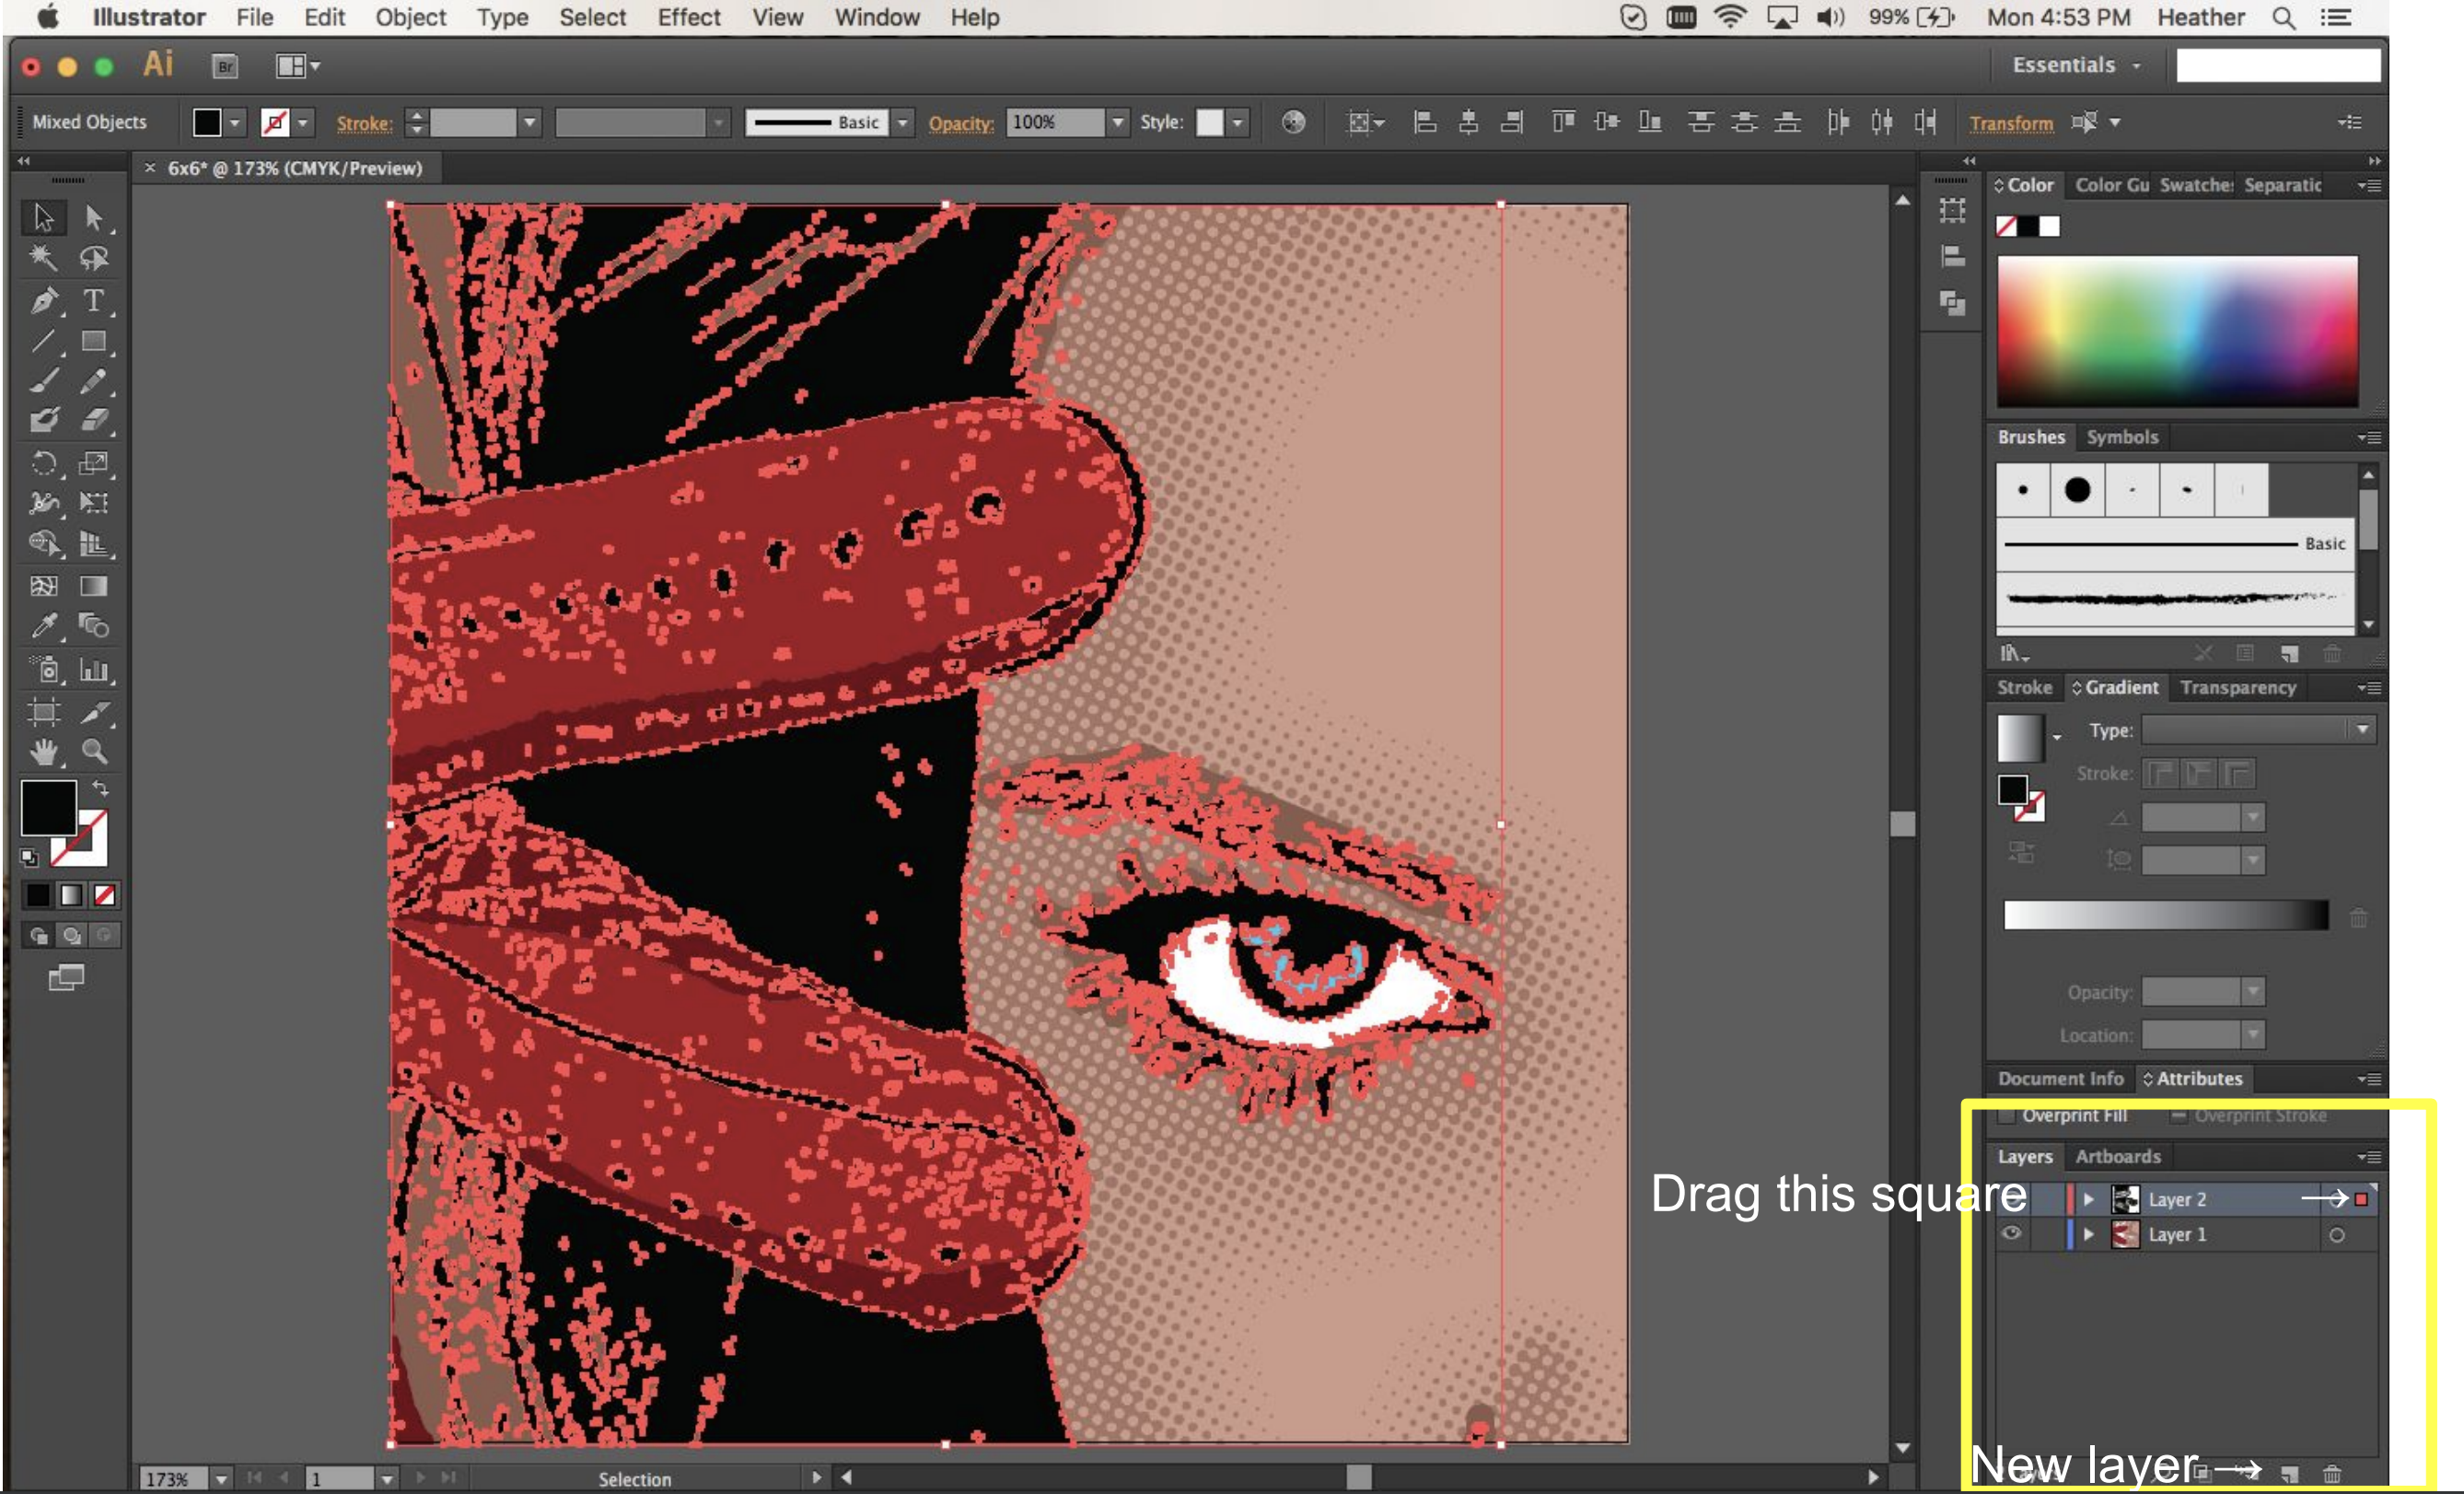
Now all black filled shapes will be selected, create a new layer and drag the little box to the new layer. Now separate the other colors to separate layers. We will make minor adjustments to each as needed. If you want to change the colors for selections (such as the eye in this case) do so now and separate the layers.
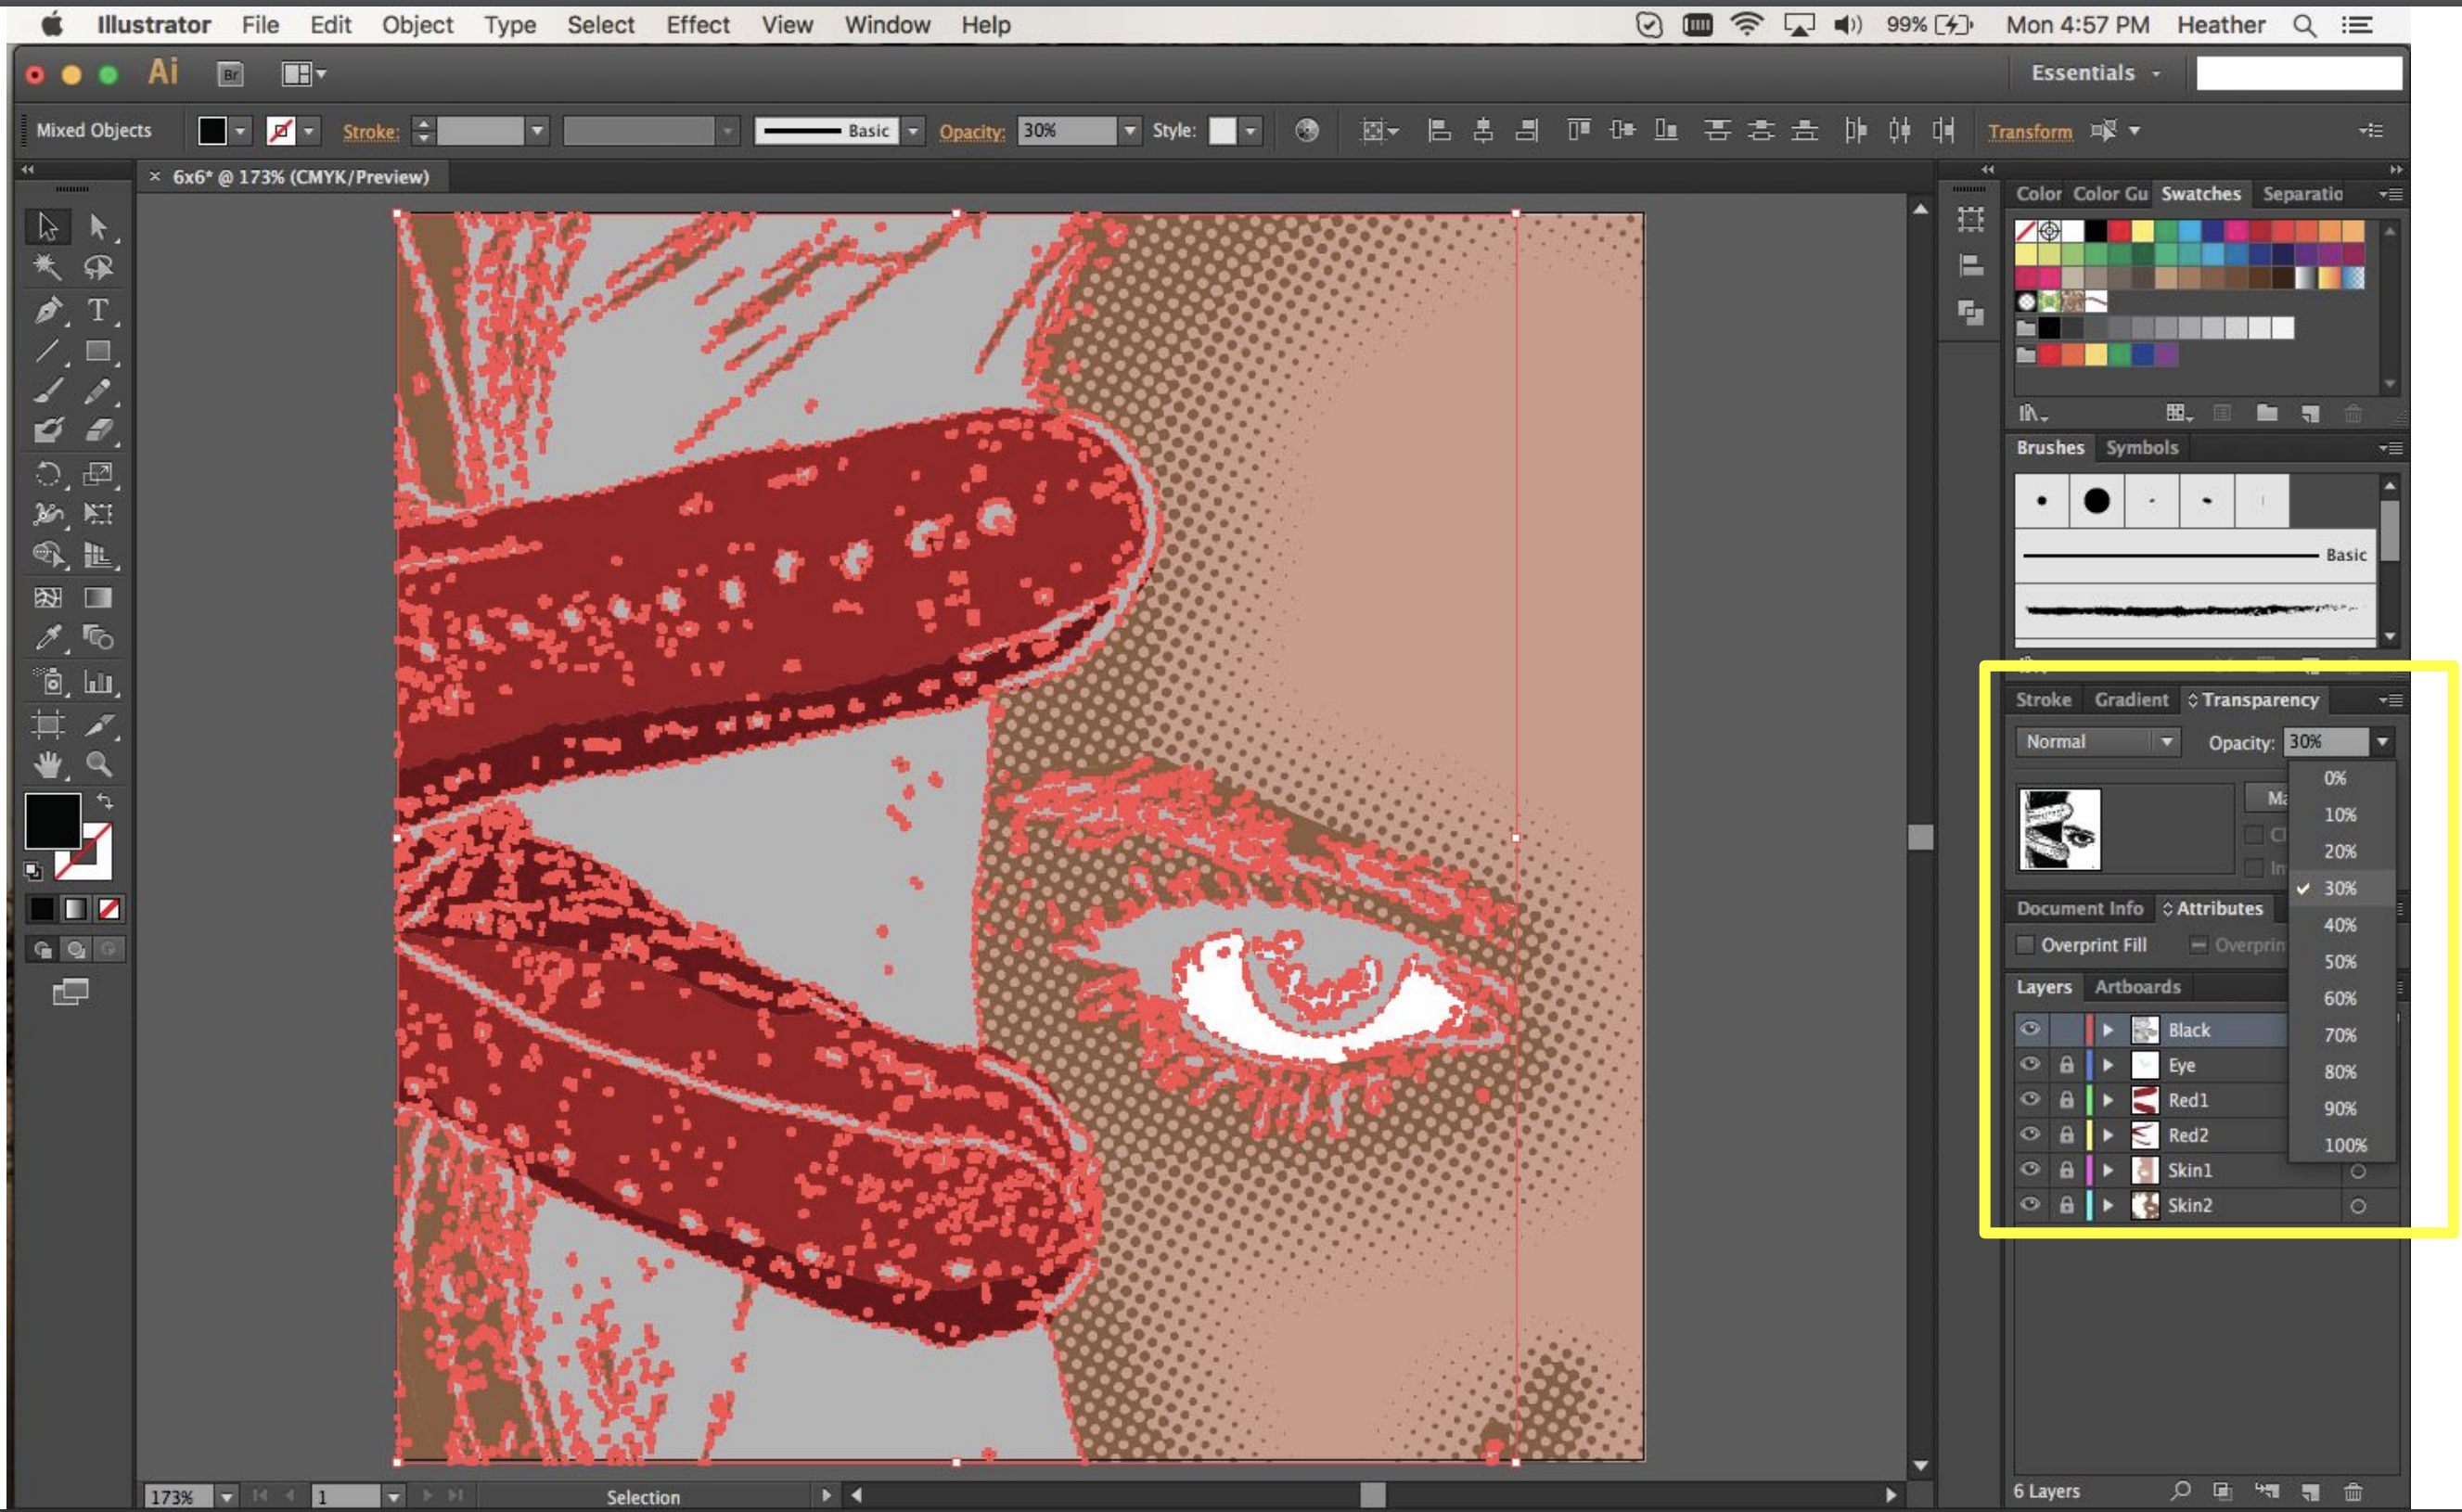
It can help to make top layers transparent so you can see where things overlap and if they will bleed too far.
Color Trapping: For the eye color, we would like to expand the color area larger so no white will show if the registration is off by a bit. Object > Path > Offset Stroke. You can also make all of the black fill transparent so you are able to tell when the blue expands too far. Check the preview box when setting distance of offset! Miter (pointed), Round (circular), or Bevel (square-cornered).

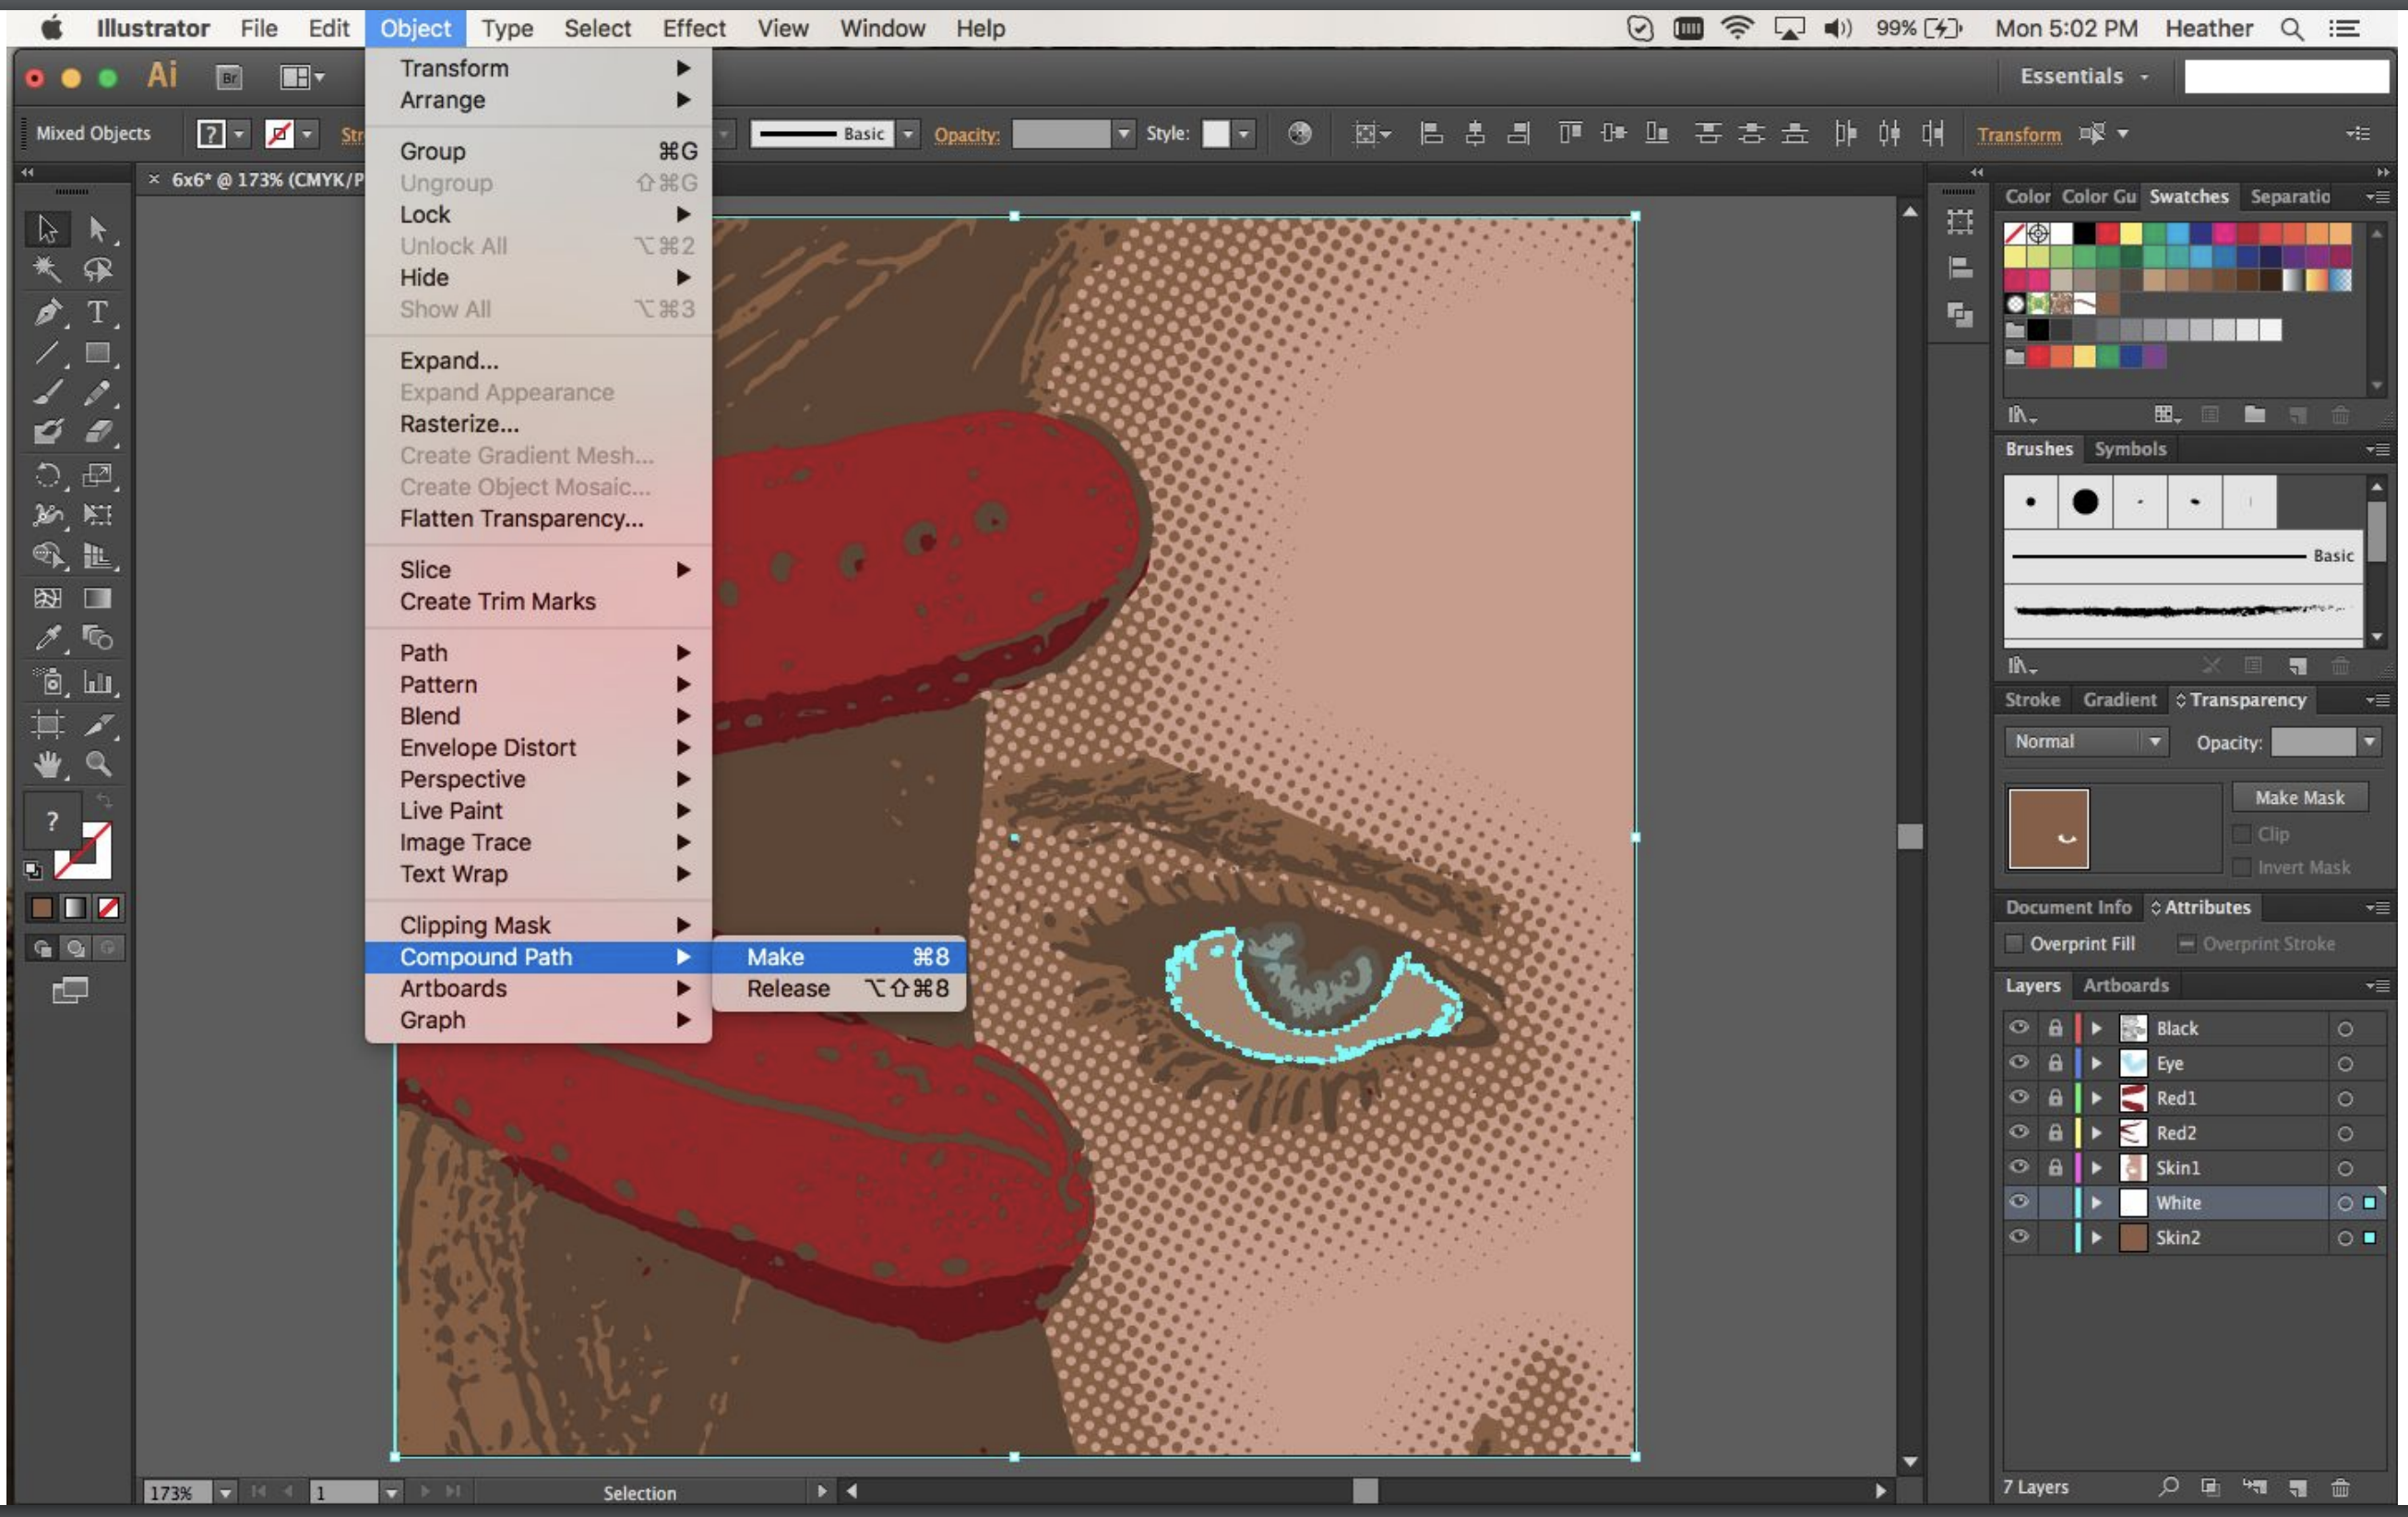
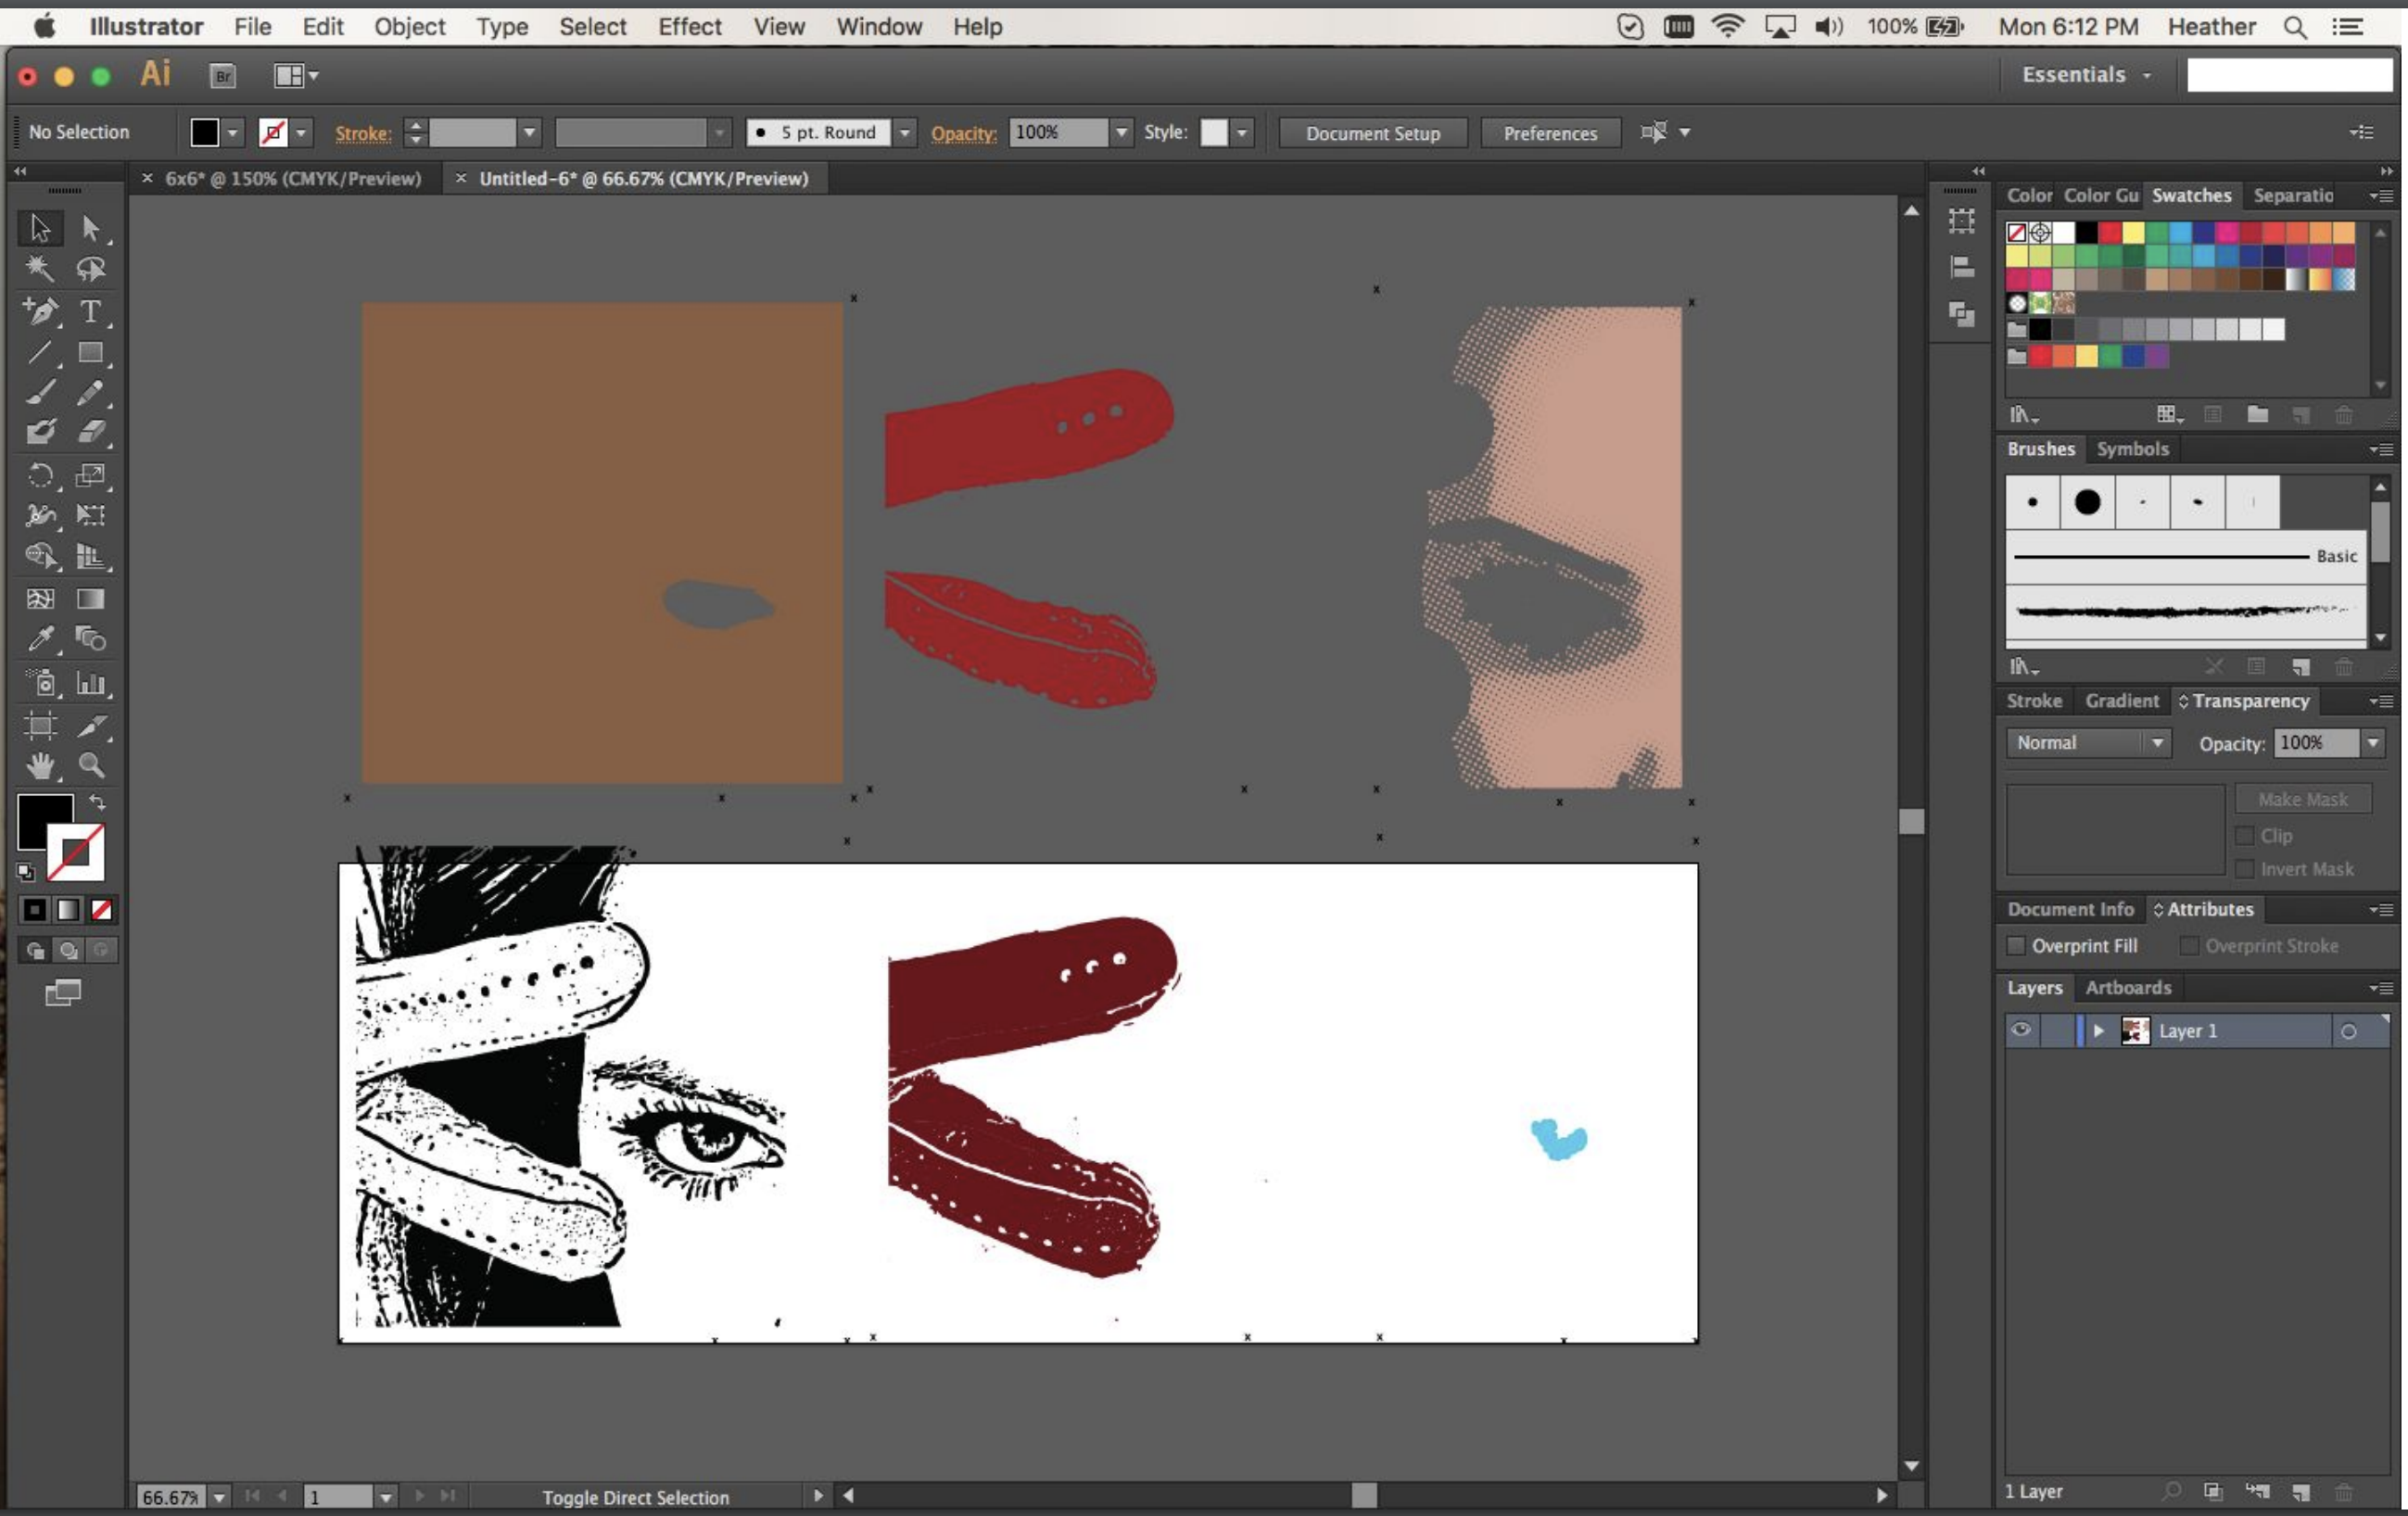
The Red here is a series of paths (an outer one & many smaller contained ones). It is good to fill in where the black will lay on top but we want to leave the holes where the dark red will show through. To do this, release the compound path. Then select only the holes you want and the larger outline shape. Now using just these remake the compound path. If there are just a few places that need to be deleted, instead of releasing the path, just double click the shape and select individual holes to delete. (see next slide).

Notice when you are within a compound path the rest of the image goes transparent and it is not possible to select other parts of the image. As you select holes in the compound path and delete them, the hole will disappear.

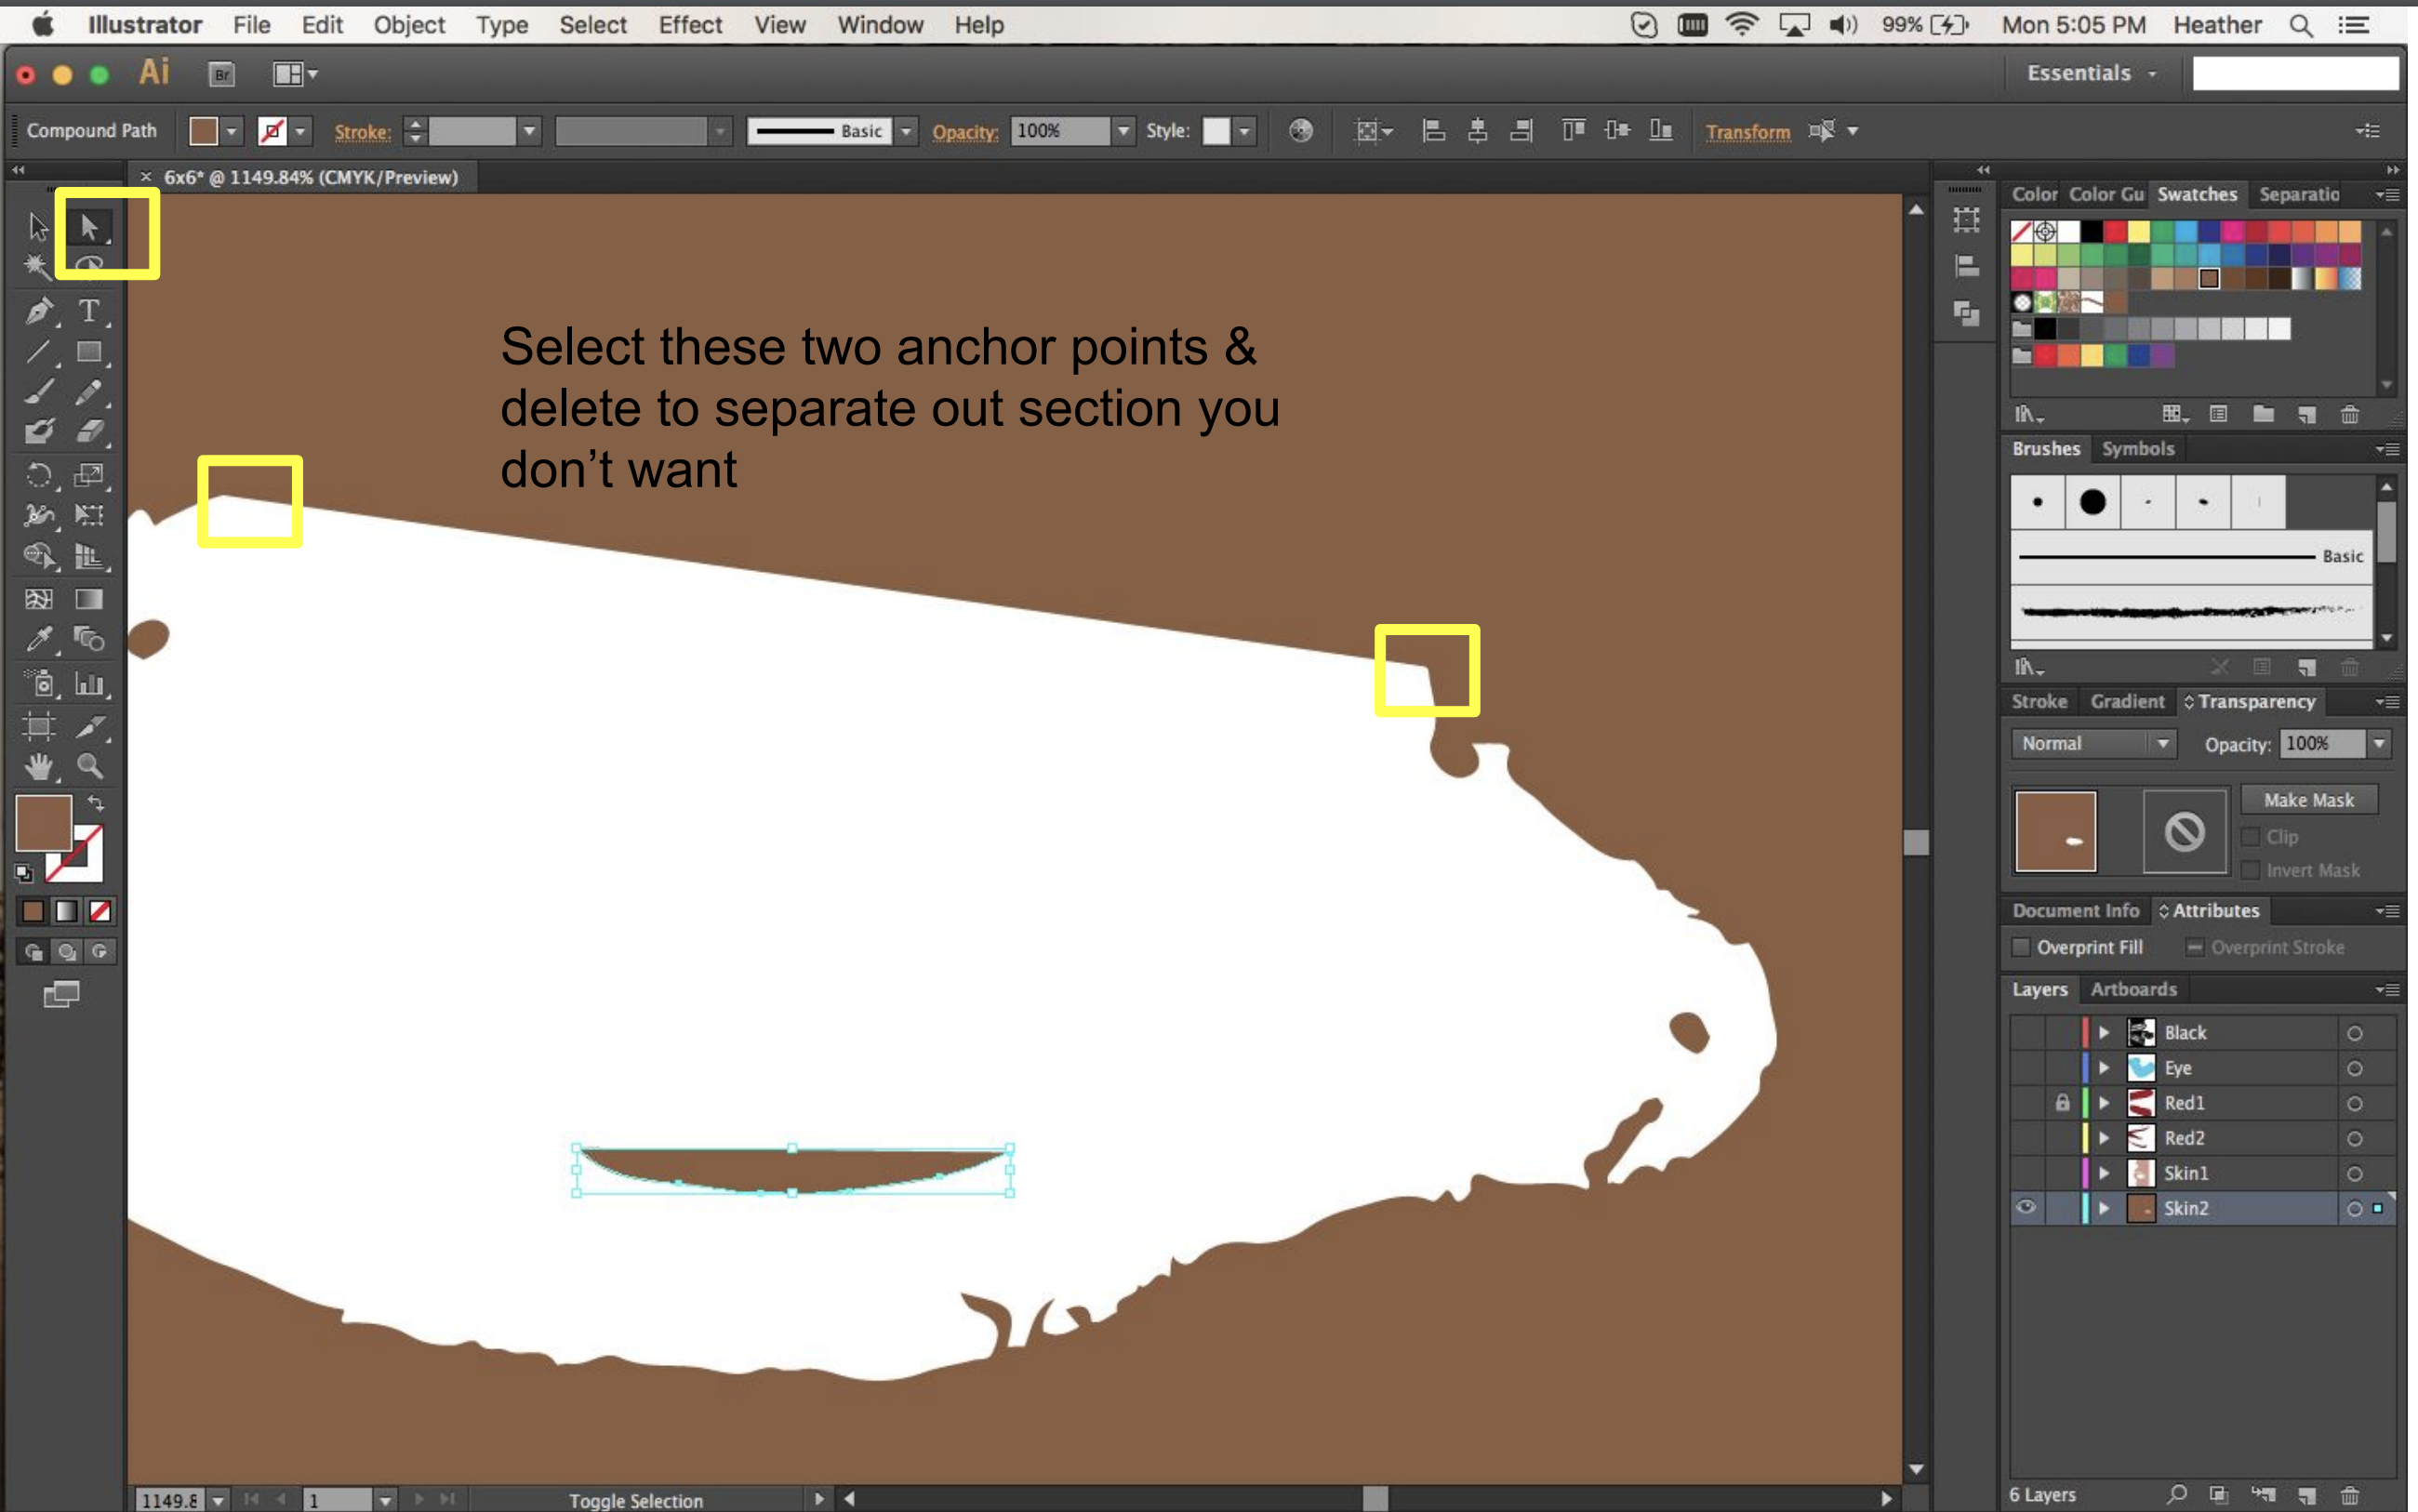
For the bottom layer, we are dropping a full square minus the shape of the eye that we want to not print on. To do this we make a 6x6” square (M), align to the board at centers, and then select the white space on the layer above. Now, make a compound path!
Because this results in the pupil area which will be covered in black, do some selective editing with the Direct Select Tool (A). Clicking two spots and deleting them will break the shapes in two, making it easier to edit out the chunk you don’t want.
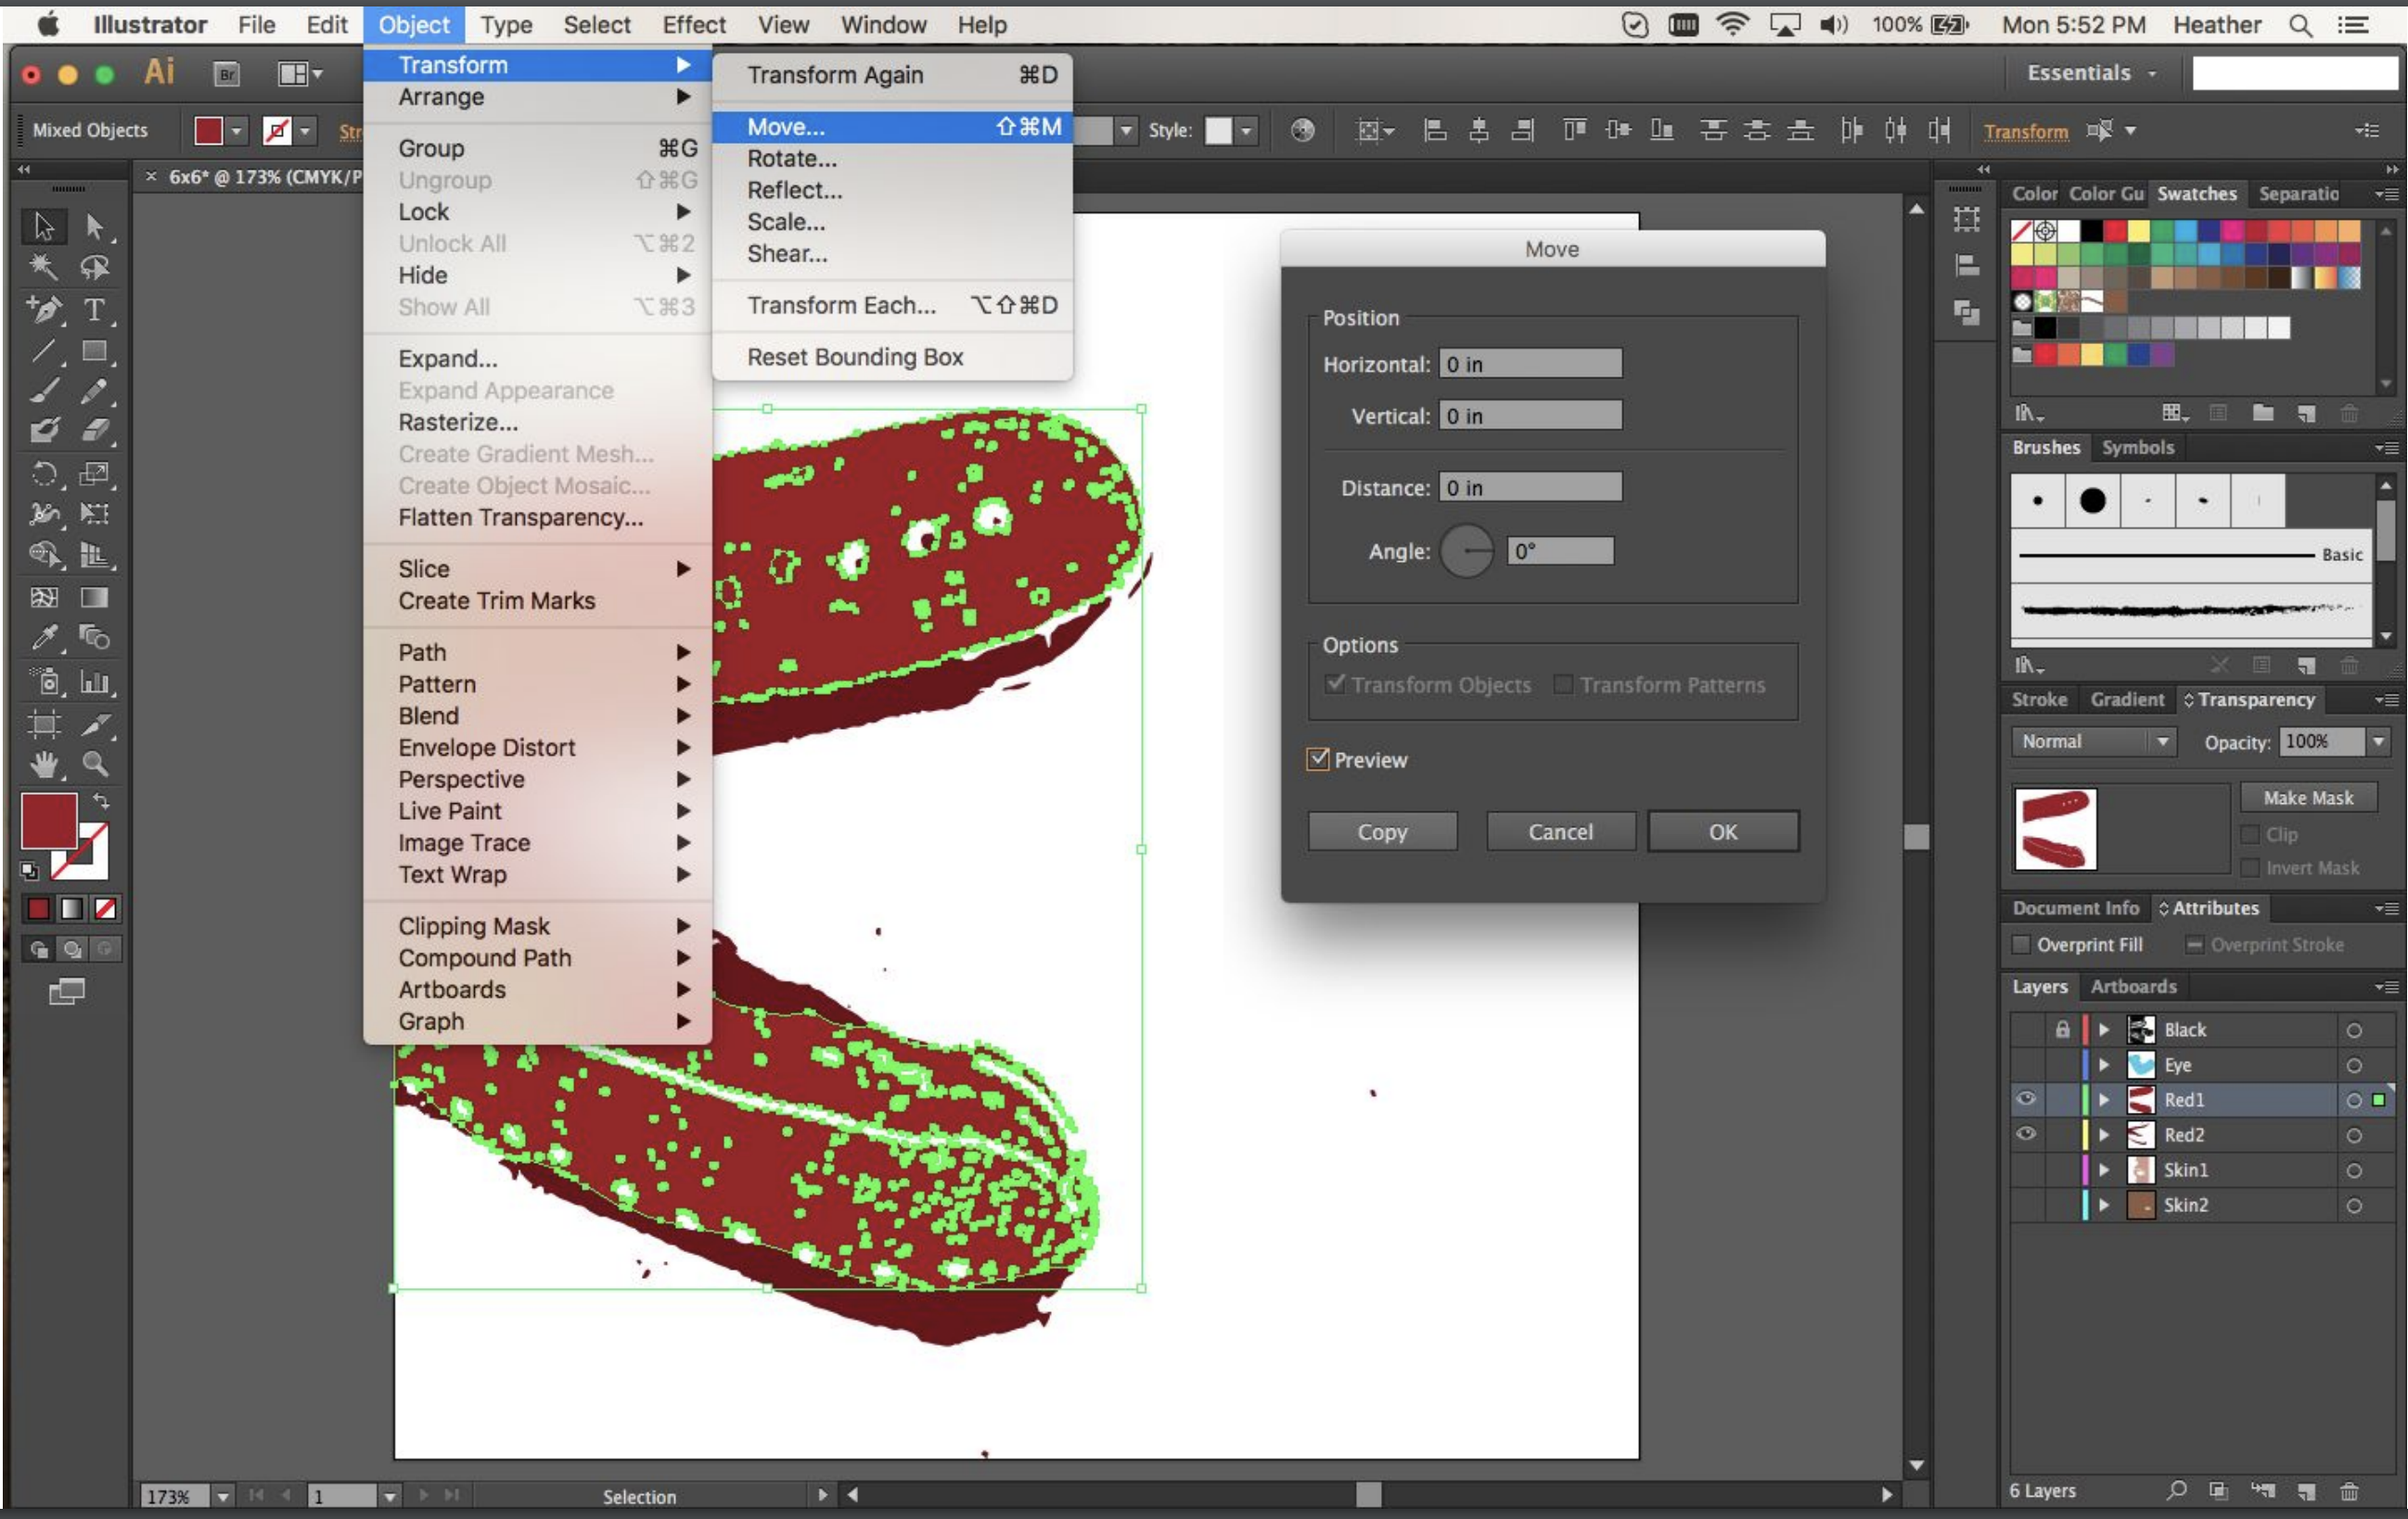
The last thing to tackle is a way to make sure the red line up well, eventually you can also consider how colors overlap as ink interact, different transparency, etc. In this case the easiest thing to do is print the dark red everywhere and then the light red on top only in a smaller section. You can group, copy, paste, and then align.. Or just Transform > Move > Copy. which will duplicate it in place.
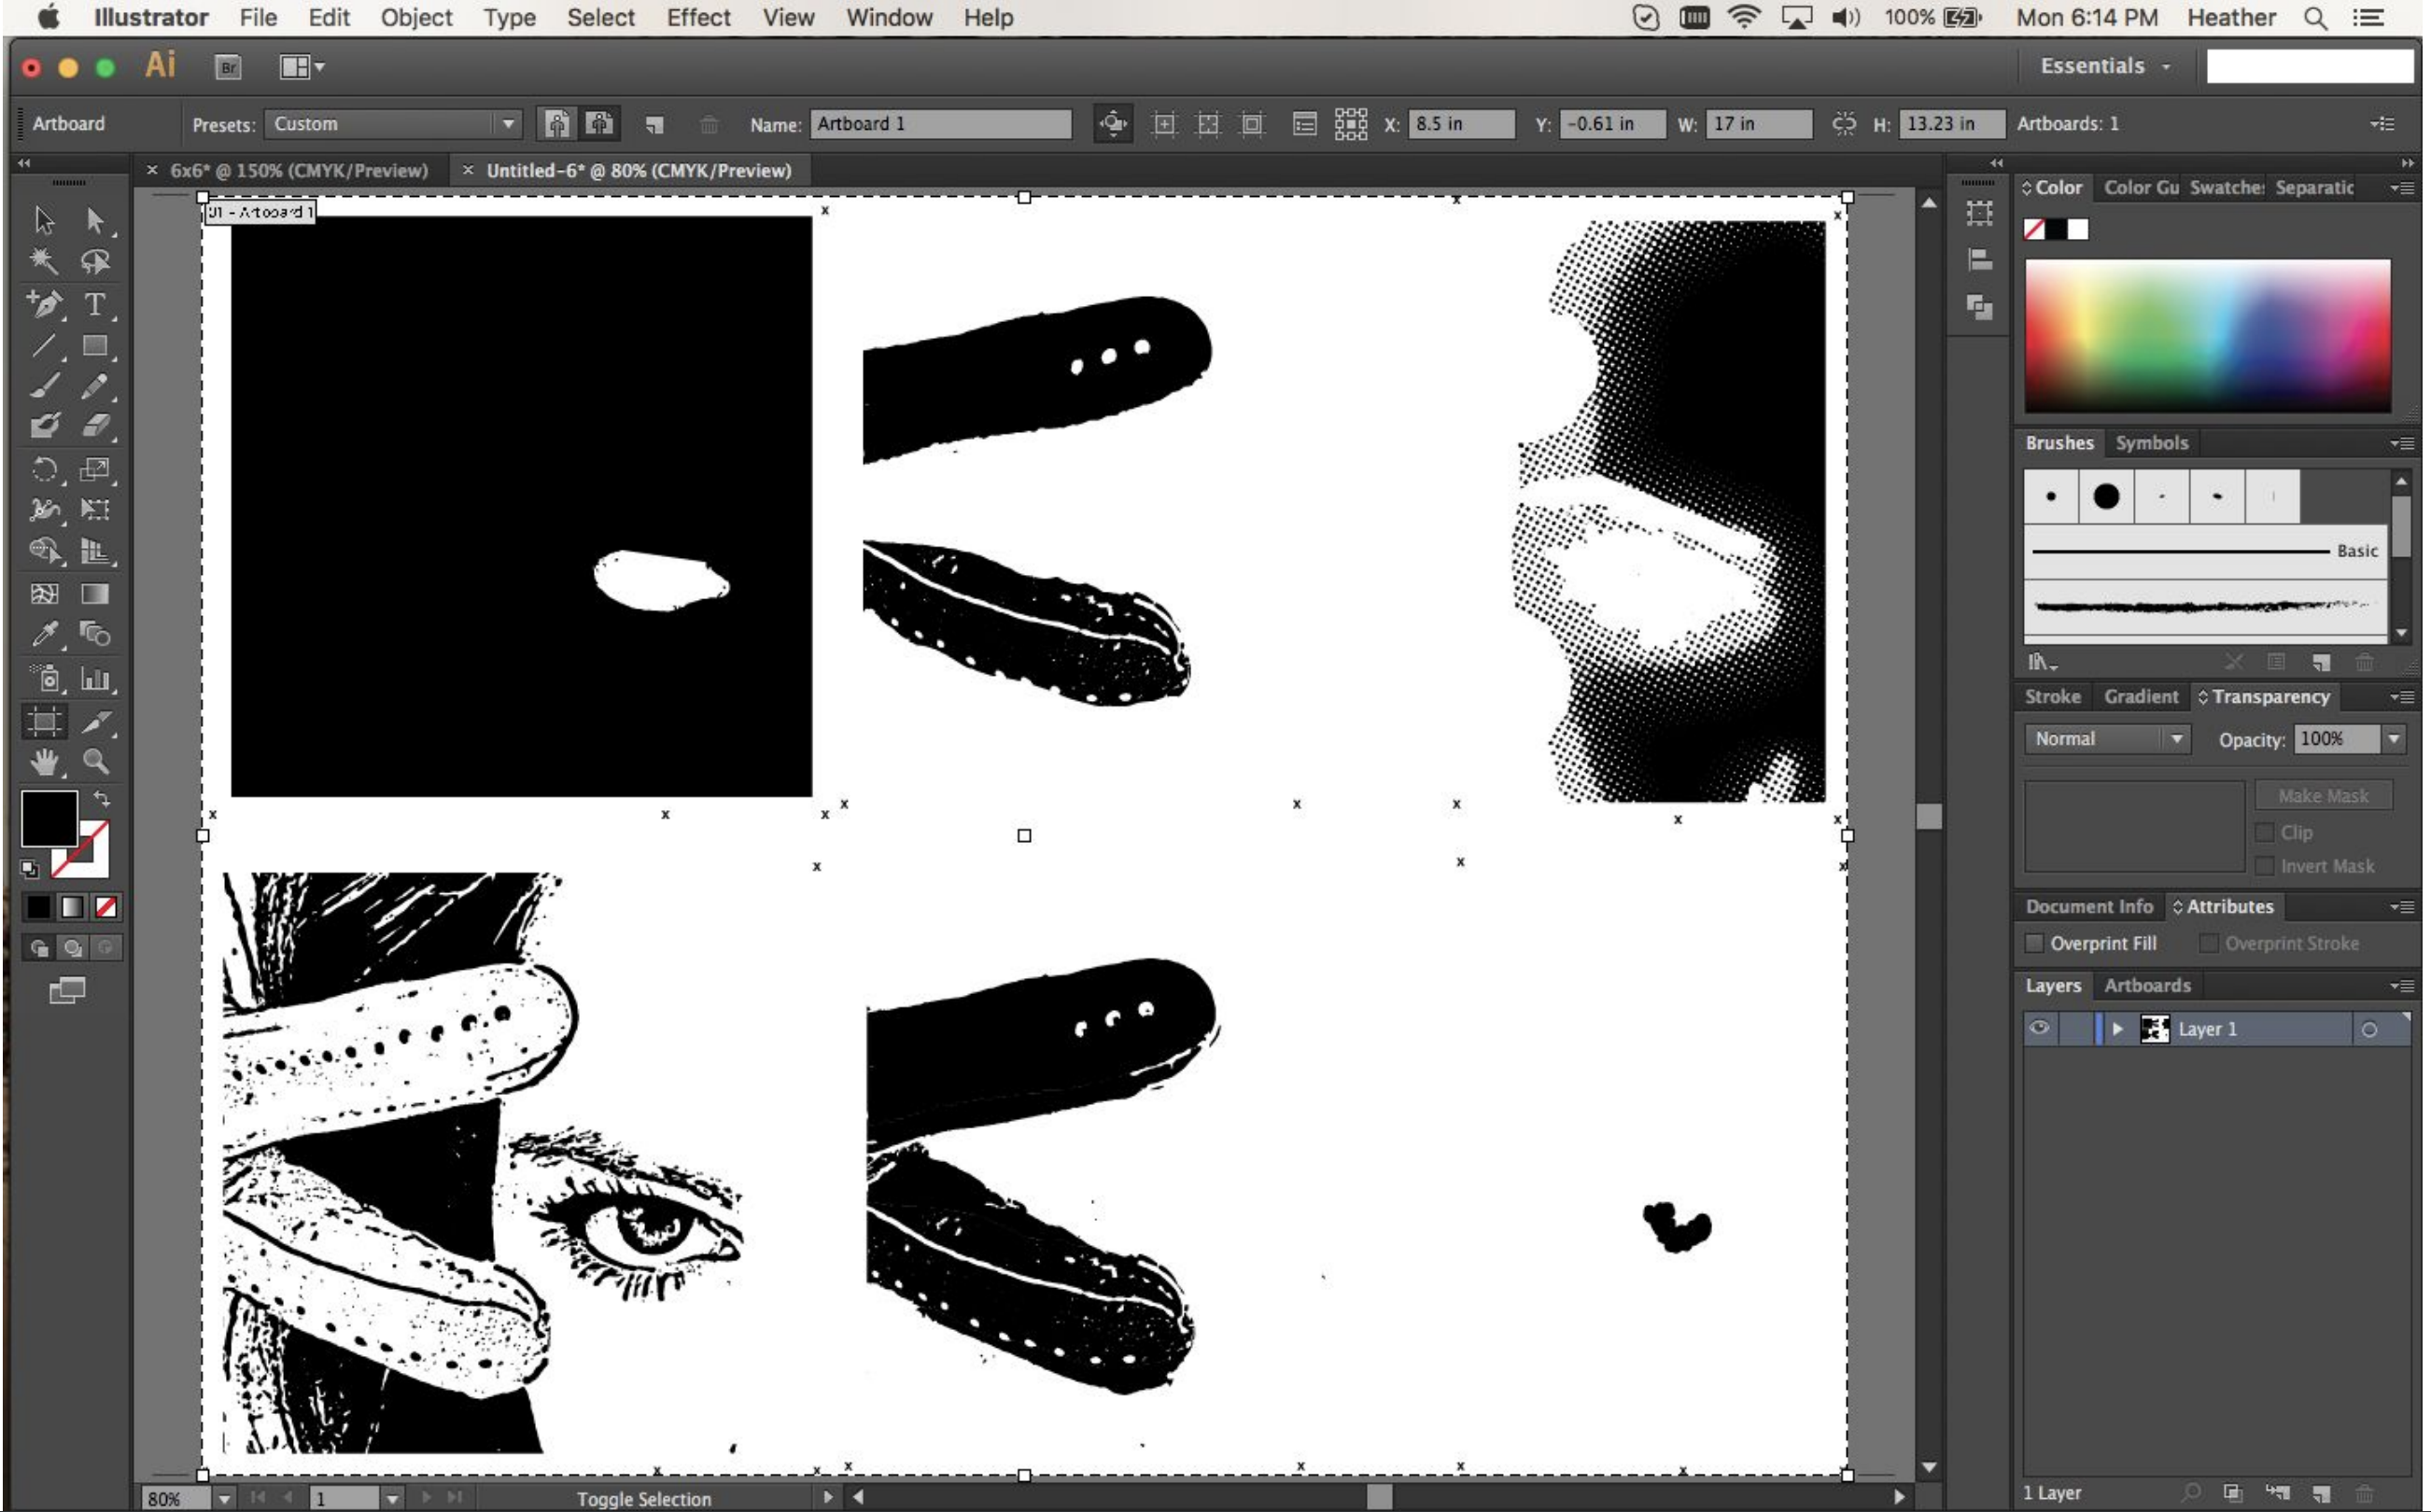
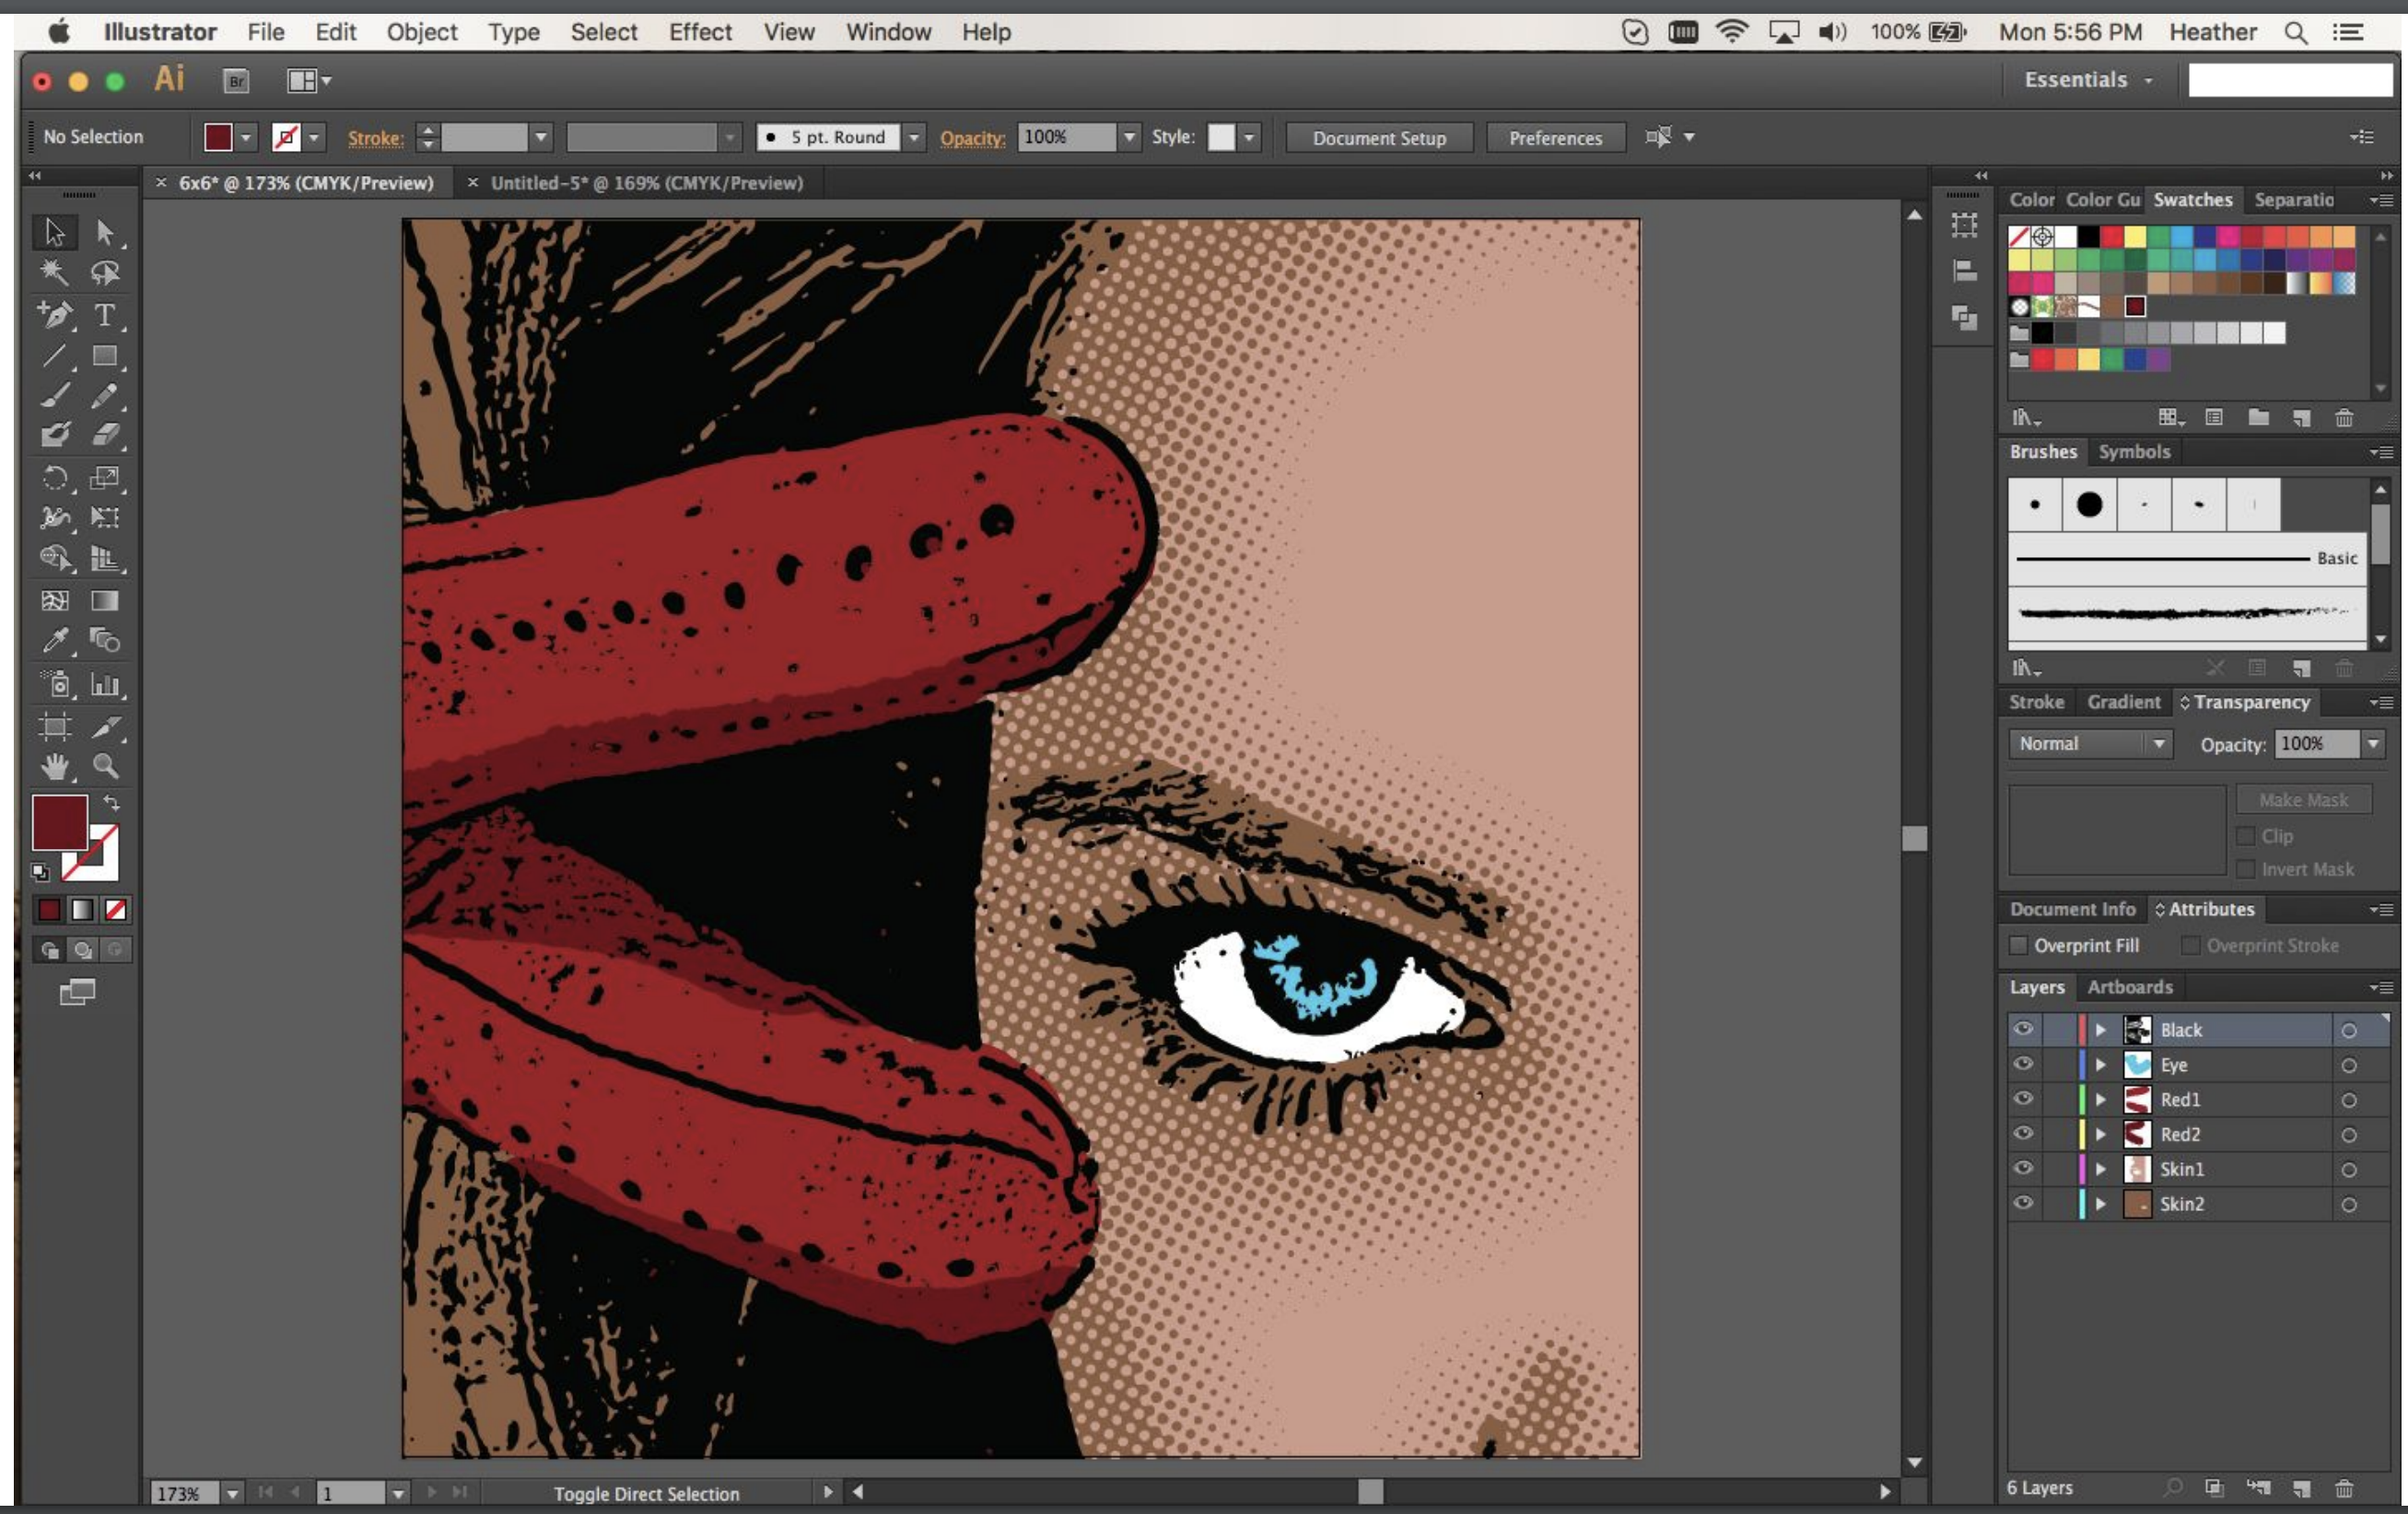
Final image is all set, print colors are on different layers.
We use 3 x's for registration. We need these on each layer when we separate them. Zoom Out (Command - ), then using the type tool (T) create an “x”. To make it easier change this to a vector by outlining the text. Command+Shift+O. Place in the lower left hand corner outside of your image region. Then click and drag while holding the alt key to duplicate the x to the right hand corner. (If you push shift after you click and drag it will keep them horizontally/vertically aligned!). Repeat for top right corner.
Select the three x and press command + g to group them. We want to duplicate these so there is a set for each color layer. Use Command C to copy and Command B to copy in place, repeat for the total number of ink colors.
Now prepare the transparency file for printing. Create a new file with 16.5 or 23.5” width (you can change the length later) The computer lab is setup to charge by size of ink area and roll width. So organizing your images to one file saves you time and $$$. If you leave everything but the registration layer & one color locked you can easily copy and paste to the new printing file. Sometimes it can be worth adding a 4th registration mark if you want to save a bit on printing.
Resize the paper to accommodate all the images and convert all to BLACK. All of the images must be printed in BLACK. It’s easier to work in color until this point. Select all (Command + A) and select fill color as black. Now follow the instructions for Large Format Epson Printing, paying special attention to the transparency film specific settings.